Openshift Connected Cluster Deployment & Nested Virtualization Setup
Bastion Configuration:
1. DNS Configuration
1.1 Install bind
yum install bind bind-utils -y
1.2 Edit the named.conf
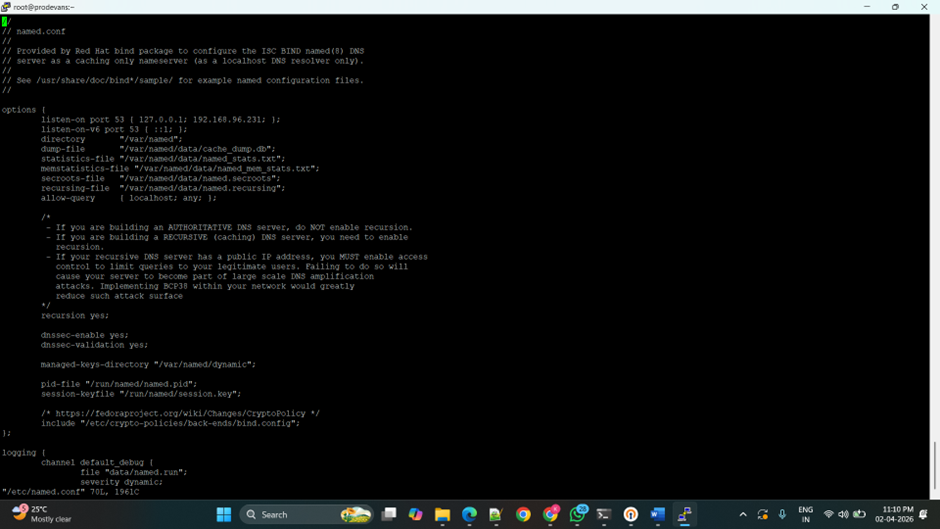
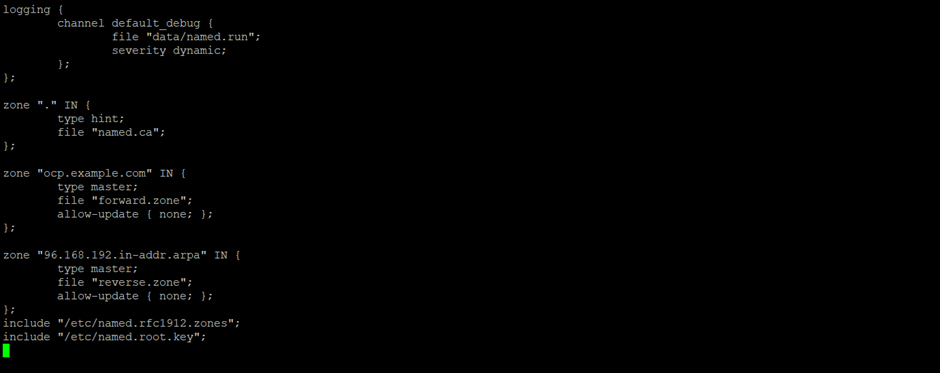
1.3 Create and edit forward.zone
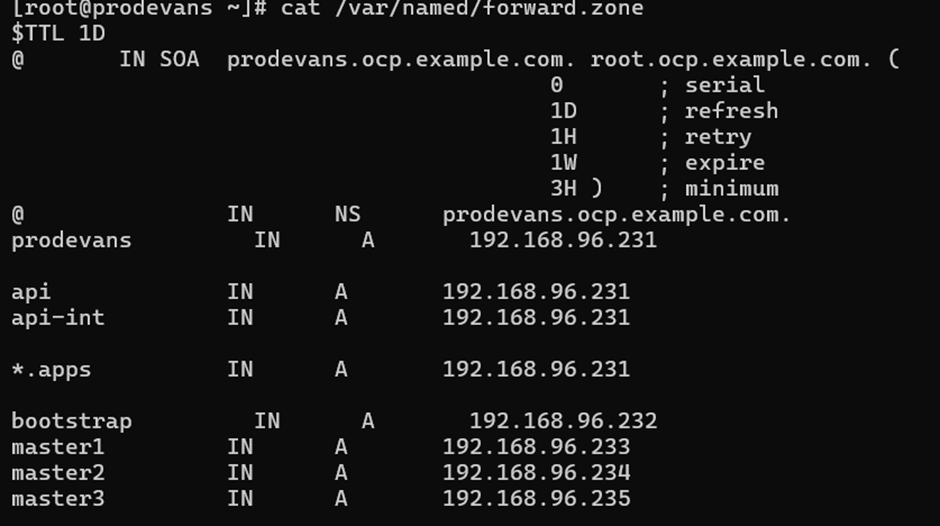
1.4 Create and edit forward.zone
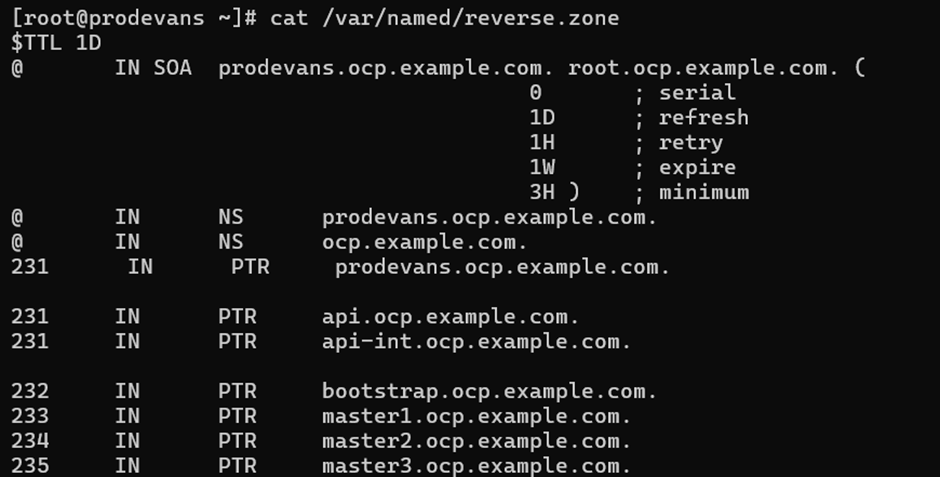
1.5 Change the ownership of forward and reverse zone files.
chown root:named /var/named/forward.zone
chown root:named /var/named/reverse.zone

1.6 Check namedconf, named zone.
named-checkconf -z /etc/named.conf

named-checkzone forward /var/named/forward.zone

named-checkzone forward /var/named/reverse.zone

1.7 Start, enable and check the named service.
systemctl start named
systemctl enable named
systemctl status named
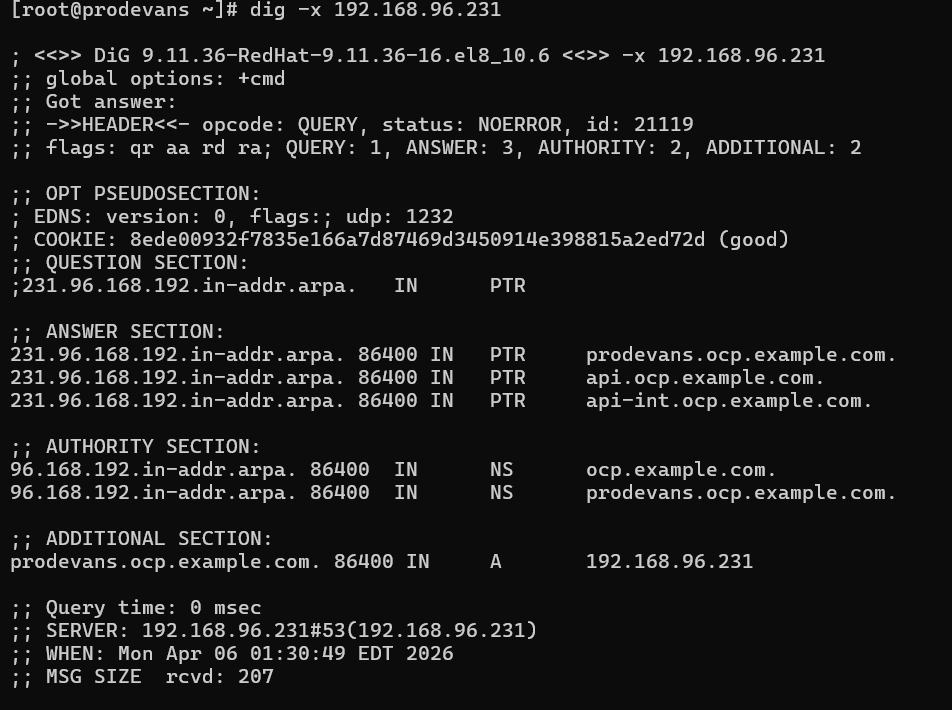
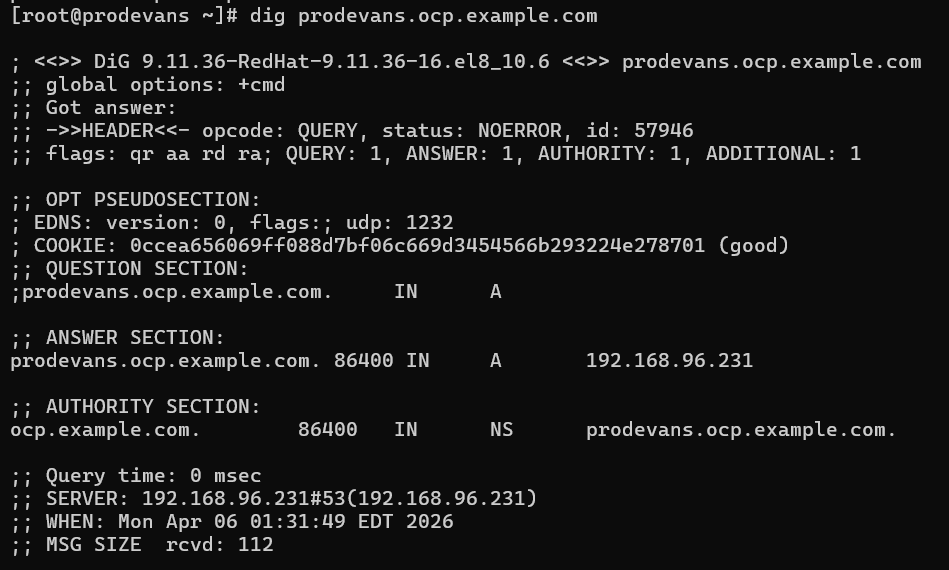
1.8 Check the resolving.
2. haproxy configuration
2.1 Install haproxy

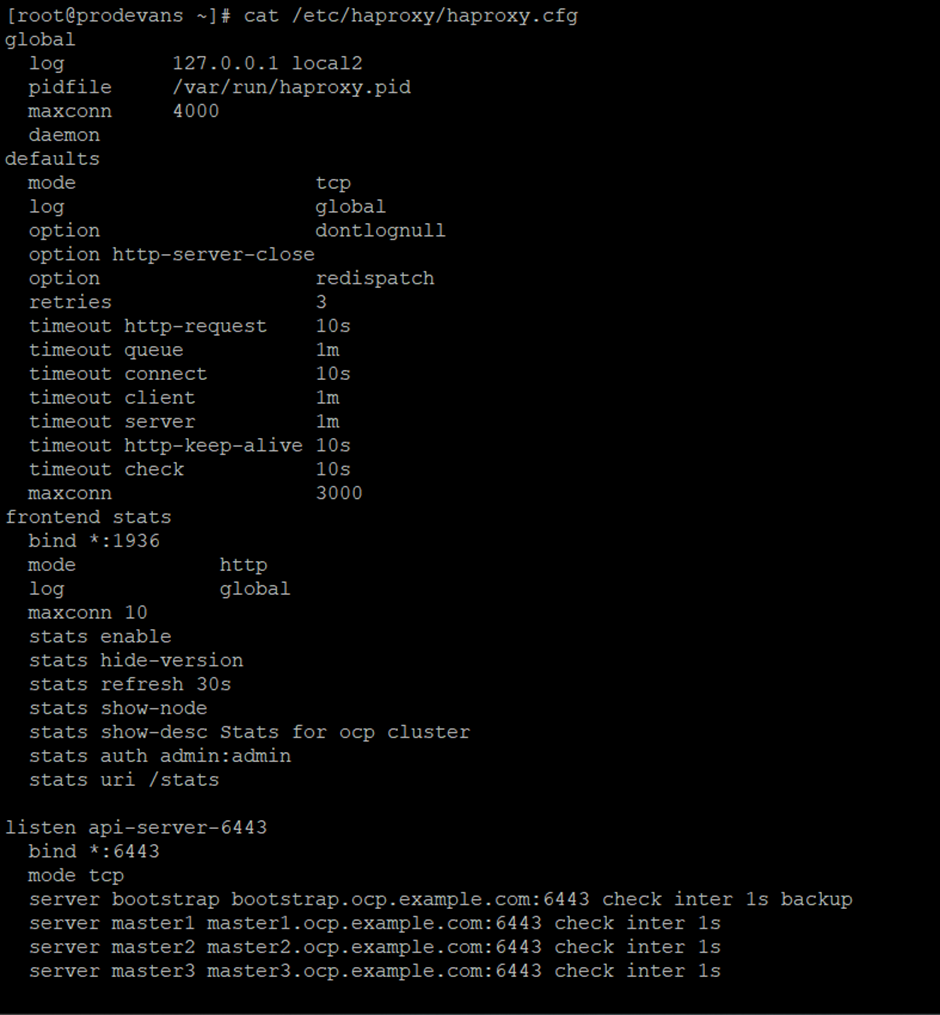
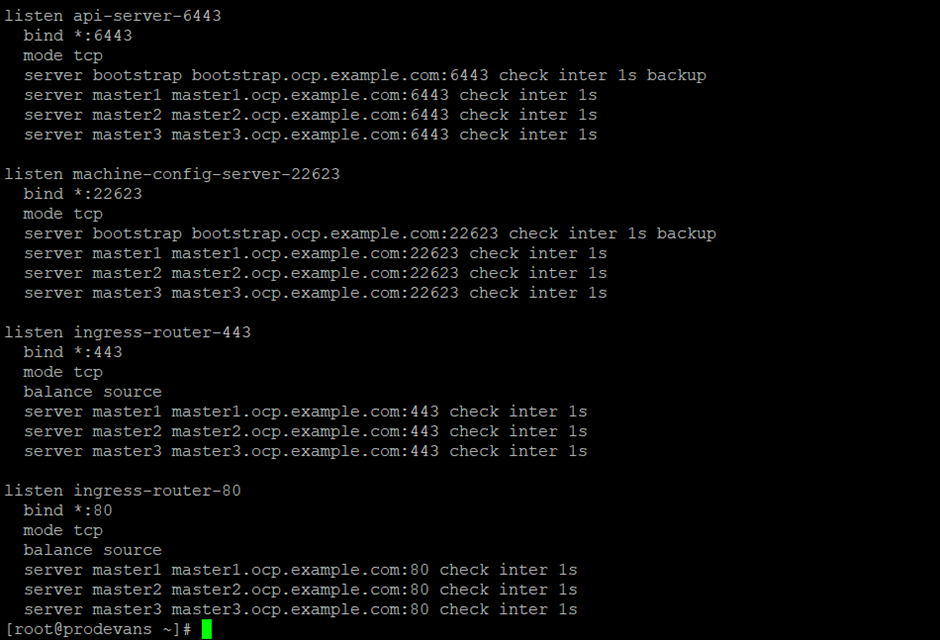
2.2 Edit haproxy configuration
2.3 Stop the firewalld service.

2.4 Stop the selinux service.

2.5 Start the haproxy service.
systemctl start haproxy
systemctl enable haproxy
systemctl status haproxy
3. Create the directory and download the mirror packages from
https://mirror.openshift.com/pub/openshift-v4/clients/ocp/
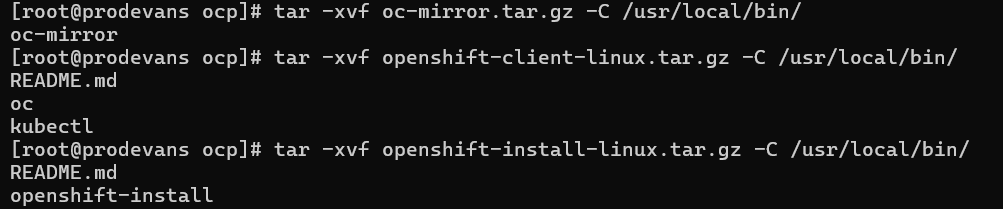
3.1 Download oc-mirror, openshift-client-linux and openshift-install-linux.
mkdir ocp
cd ocp/
3.2 Untar the files in the ocp directory

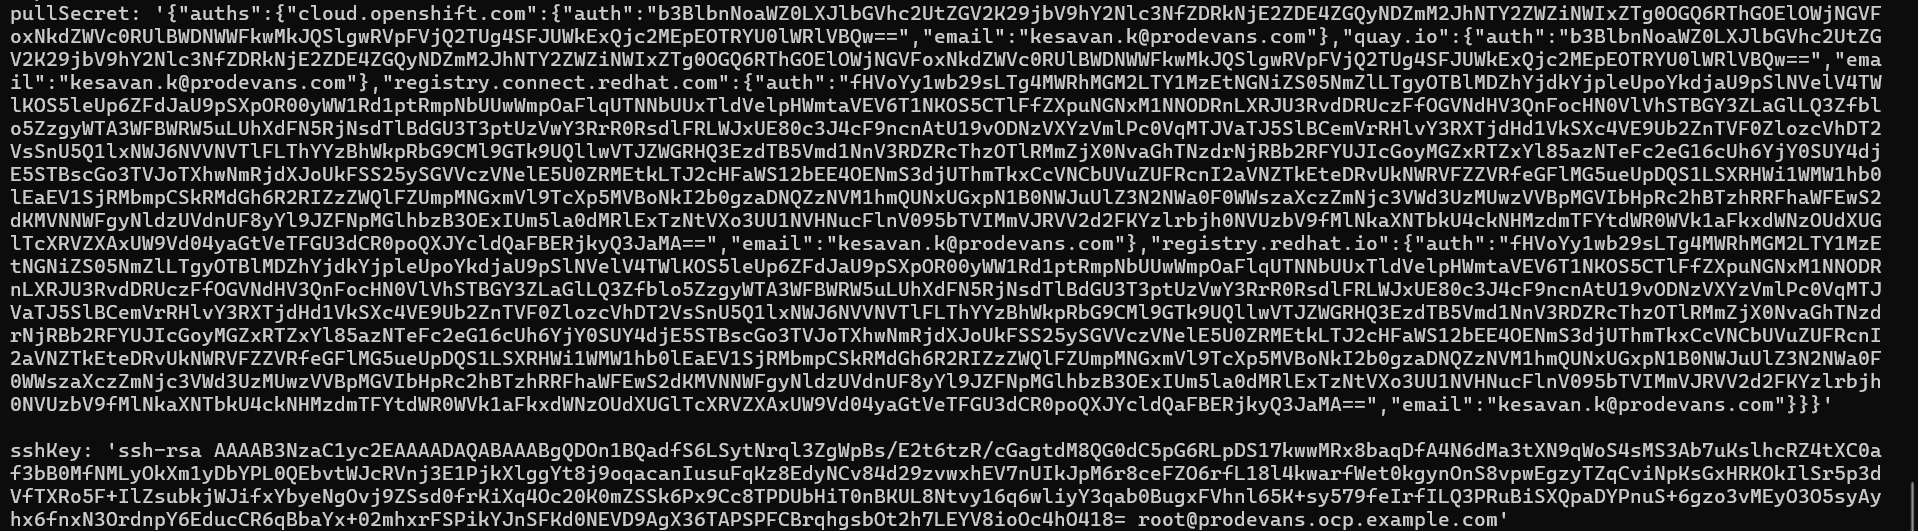
4. Copy the pull secret file from
https://console.redhat.com/openshift/downloads
5. Generate sshKey
ssh-keygen


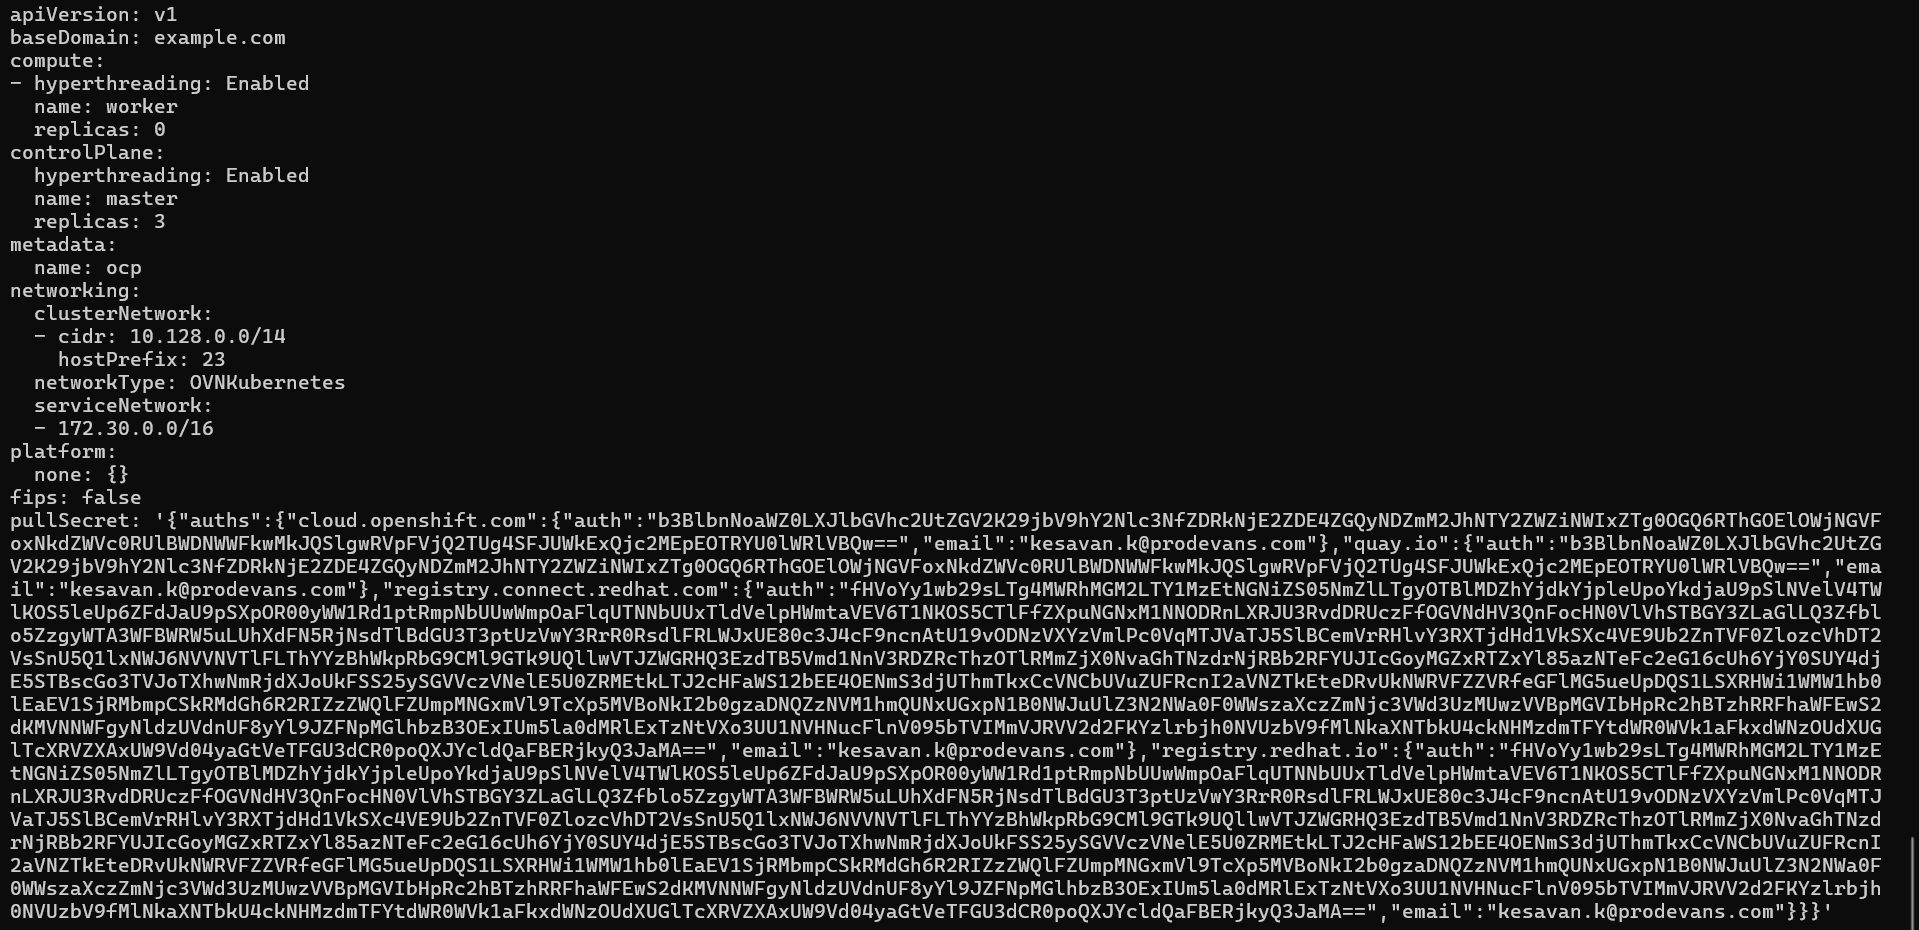
6. Create a ignition directory and create install-config.yaml file.
mkdir ignition
cd ignition/
vi install-config.yaml
6.1 Create manifests in the ignition directory.
[root@prodevans ignition]# openshift-install create manifests
INFO Consuming Install Config from target directory
WARNING Making control-plane schedulable by setting MastersSchedulable to true for Scheduler cluster settings
INFO Manifests created in: manifests and openshift
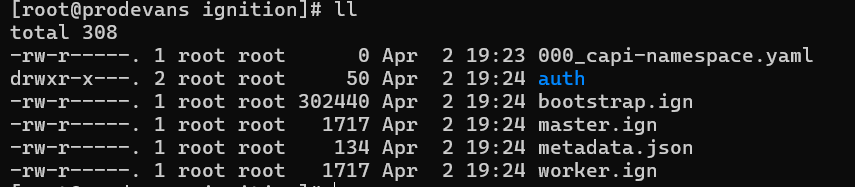
6.2 Create ignition in the ignition directory.
[root@prodevans ignition]# openshift-install create ignition-configs
INFO Consuming Common Manifests from target directory
INFO Consuming Master Machines from target directory
INFO Consuming Openshift Manifests from target directory
INFO Consuming OpenShift Install (Manifests) from target directory
INFO Consuming Worker Machines from target directory
INFO Ignition-Configs created in: . and auth
7. Install httpd service and change the port number.
7.1 Installing httpd service

7.2 Change the port number in the httpd configuration

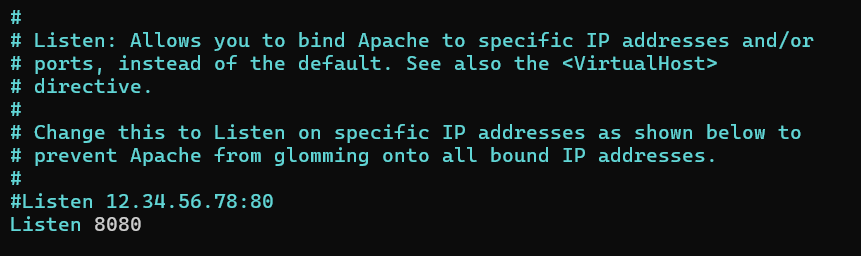
Change the Listen port 80 to 8080.
8. Copy all the .ign files from ignition directory to /var/www/html/
cp ignition/*.ign /var/www/html/
ll /var/www/html
chmod 655 /var/www/html/*.ign
ll /var/www/html

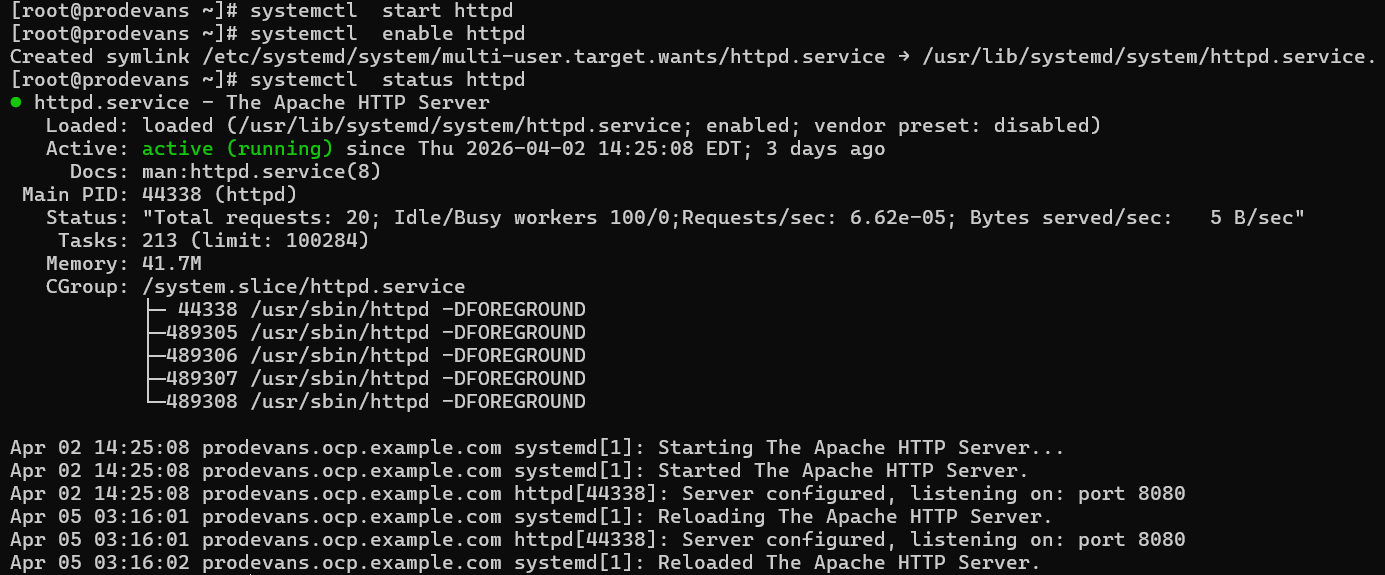
8.1 Enable, start and check the status of httpd service.
systemctl start httpd
systemctl enable httpd
systemctl status httpd
Now the Bastion machine setup is completed.
Bootstrap Configuration
Create Bootstrap VM and become the root user then configure the network.
1. Then install the coreos.
coreos-installer install /dev/sda --ignition-url=http://192.168.96.231:8080/bootstrap.ign --insecure-ignition -copy-network --insecure
2. Reboot the machine.
reboot
3. After successful reboot, ssh into bootstrap using bastion machine.
ssh core@bootstrap
It will show journalctl command. Run that command to make sure bootstrap is running fine.
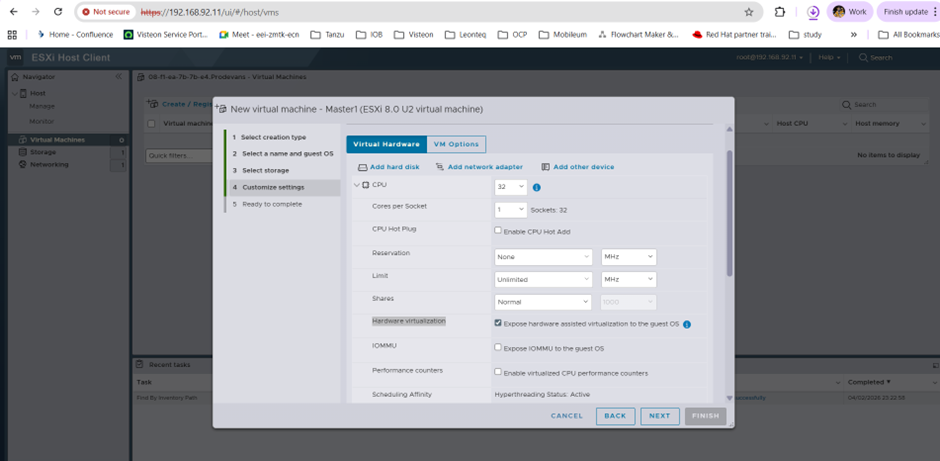
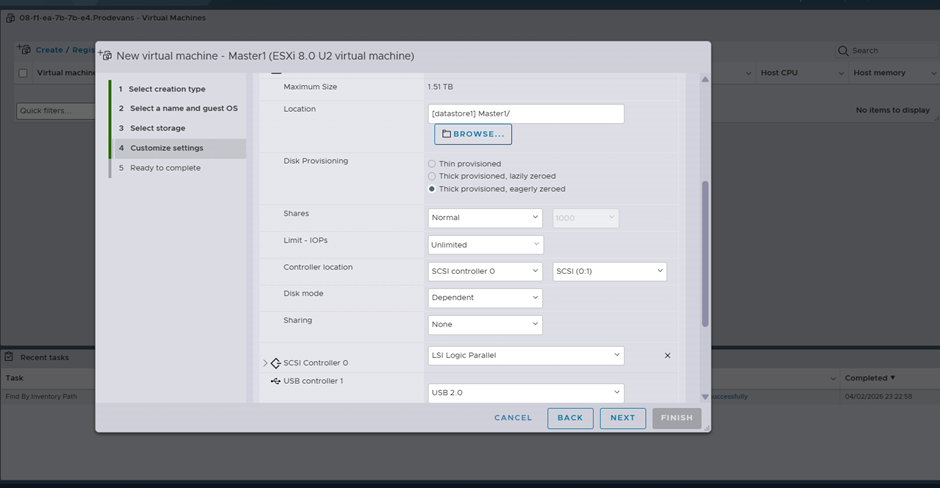
Configure customize setting for master & opting nested virtualization.
Allocate CPU :32
Enable Hardware Virtualization Expose hardware-assisted virtualization to the guest OS
Allocate memory 32 GB and storage 150GB Thin Provisioning
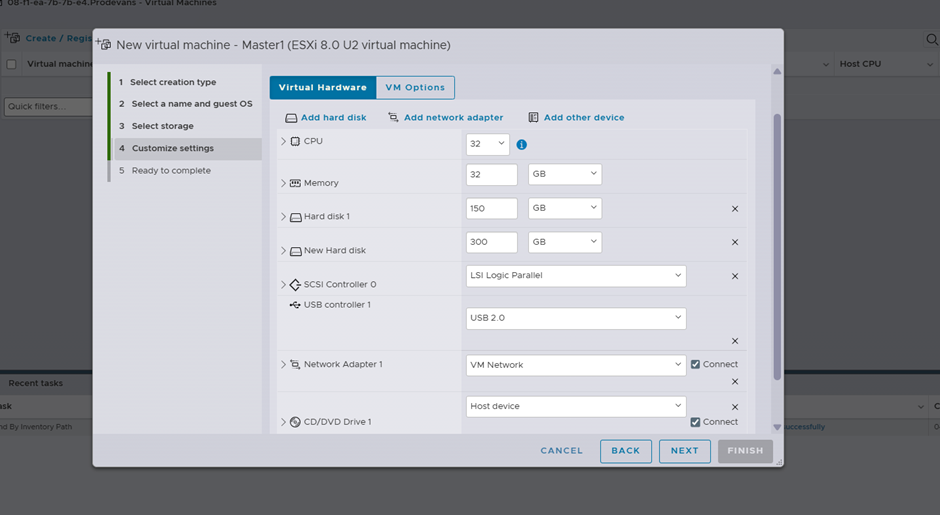
Add the addional disk with thick provisioning
Master & Worker Configuration
After creating the Master VM’s with the configure the network.
1. Then install the coreos.
coreos-installer install /dev/sda --ignition-url=http://192.168.96.231:8080/master.ign --insecure-ignition -copy-network --insecure
2. After the coreos is installed. reboot the machine.
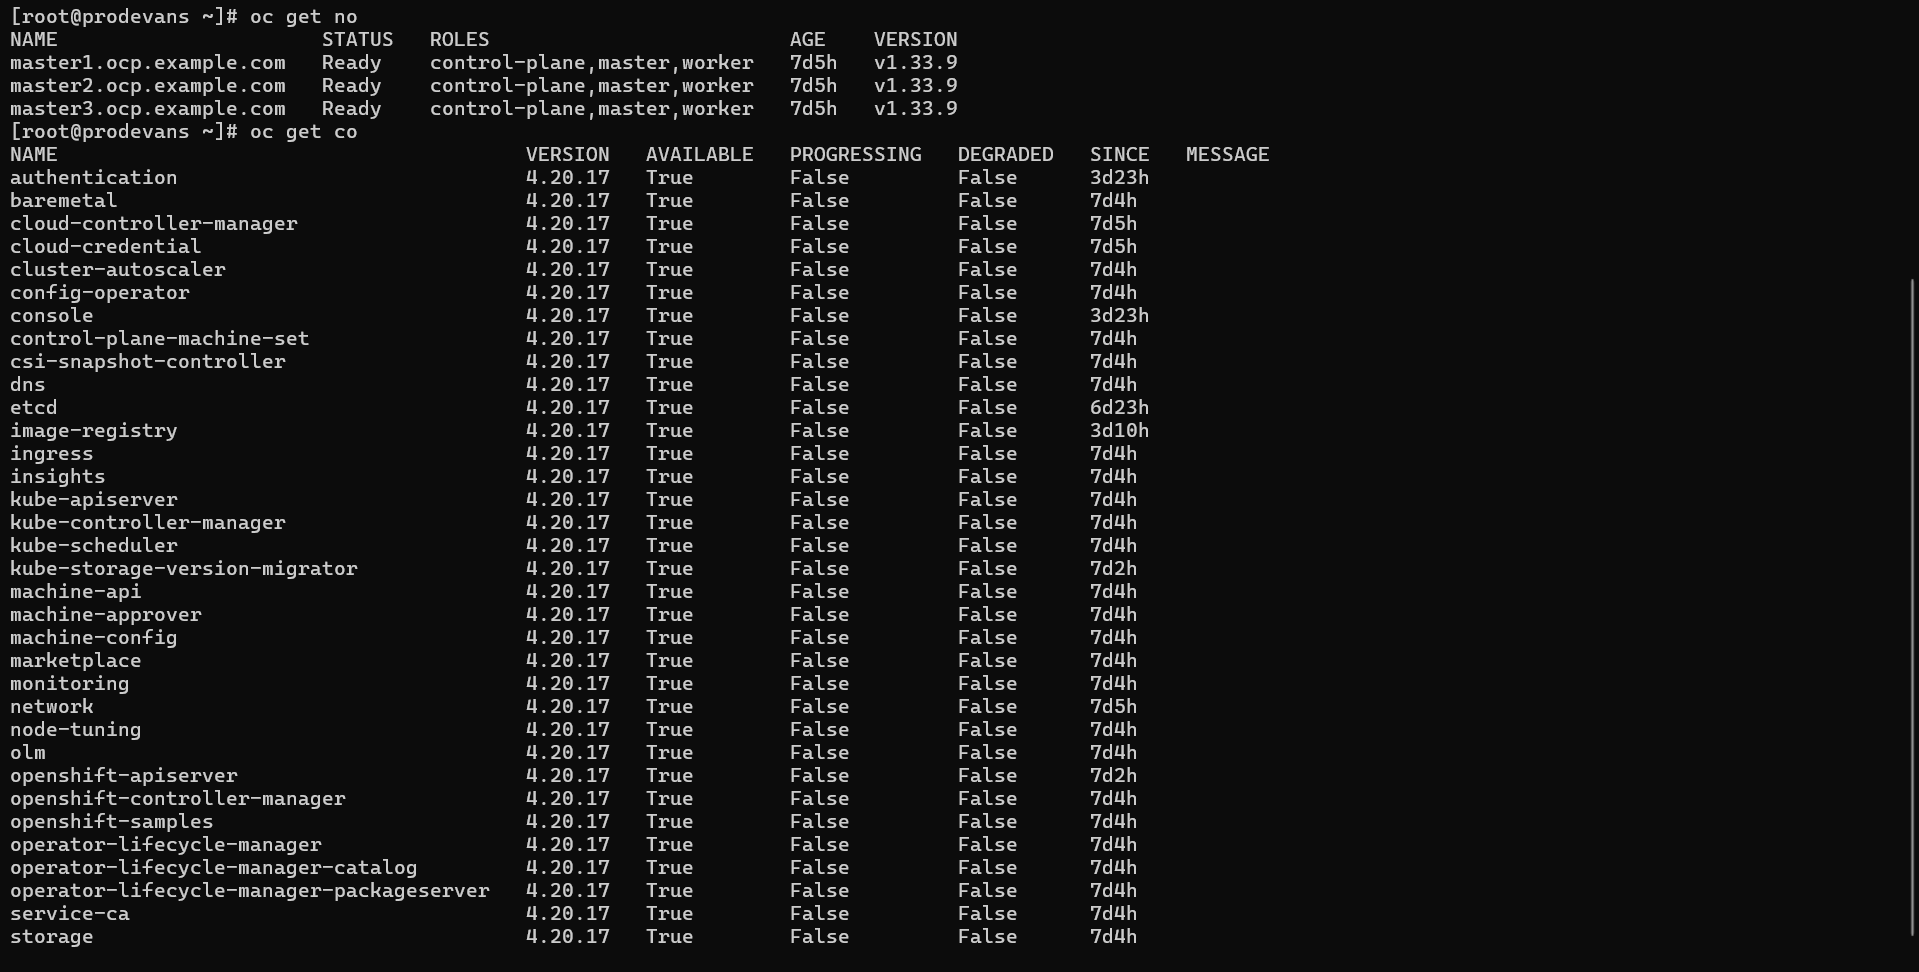
Check for Certificates, nodes and cluster operators in the bastion machine.
Export the kubeconfig in the bastion machine.
export KUBECONFIG=ignition/auth/kubeconfig
Check:
1. oc get csr
2. oc get no
3. oc get co
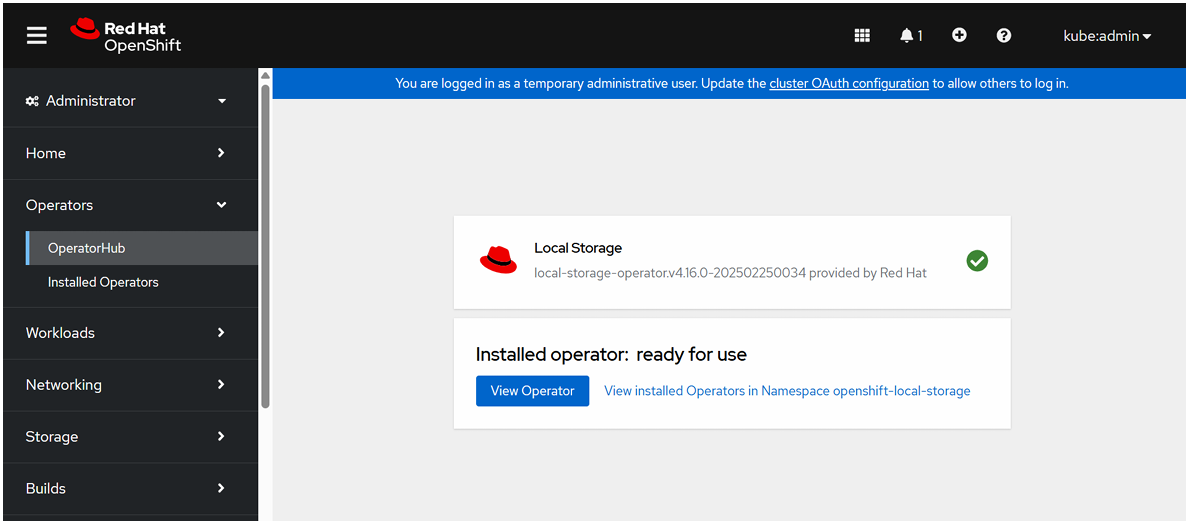
ODF Configuration
Go to Ecosystem → Software Catalog→ search Local Storage
Local Storage Operator is used to discover and make local disks on cluster nodes available as Kubernetes storage.
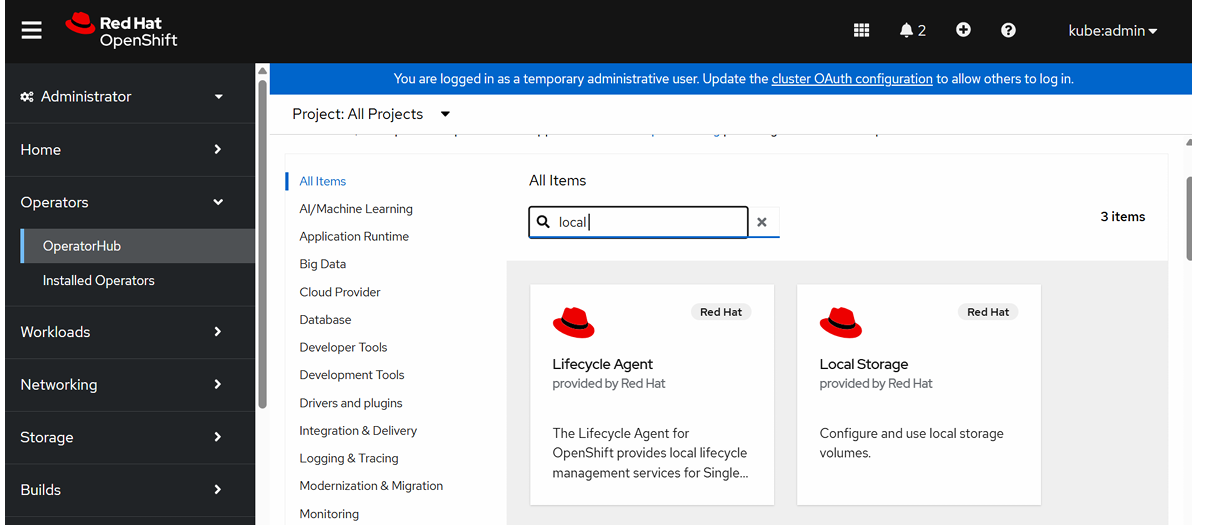
Click Local Storage and Install
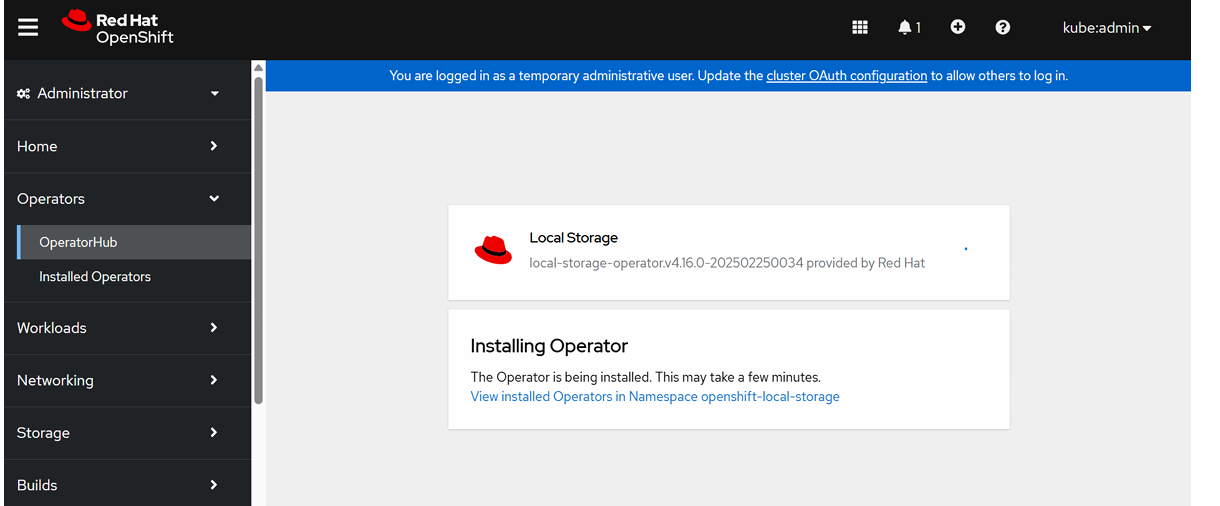
To verify Local Storage Operator Installation,
Installing OpenShift Data Foundation Operator:
ODF is used to create distributed, highly available storage inside OpenShift.
Go to Ecosystem→ Software Catalog→ search OpenShift Data Foundation
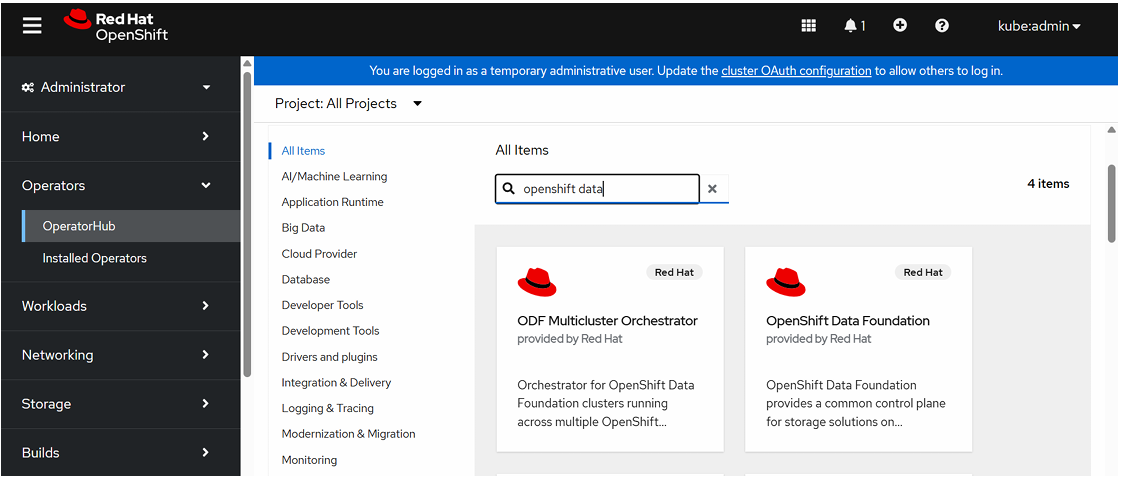
Click OpenShift Data Foundation Operator and click install.
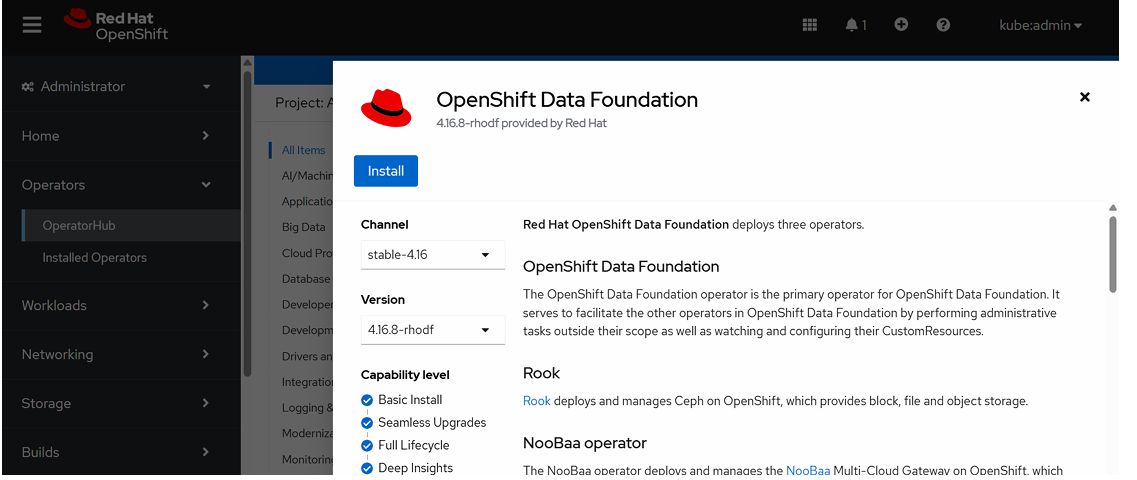
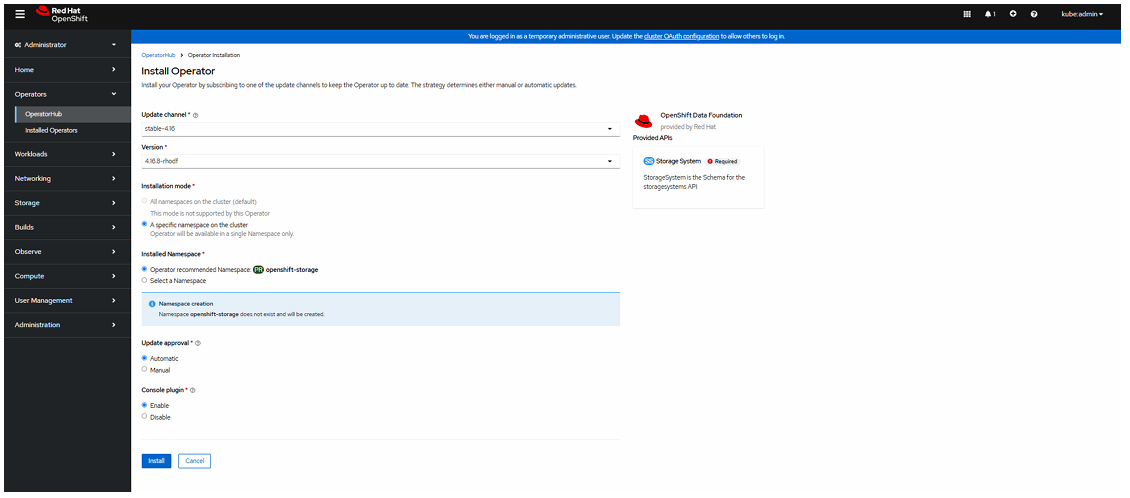
Select Update Channel, Version, Name Space and Update Approval.
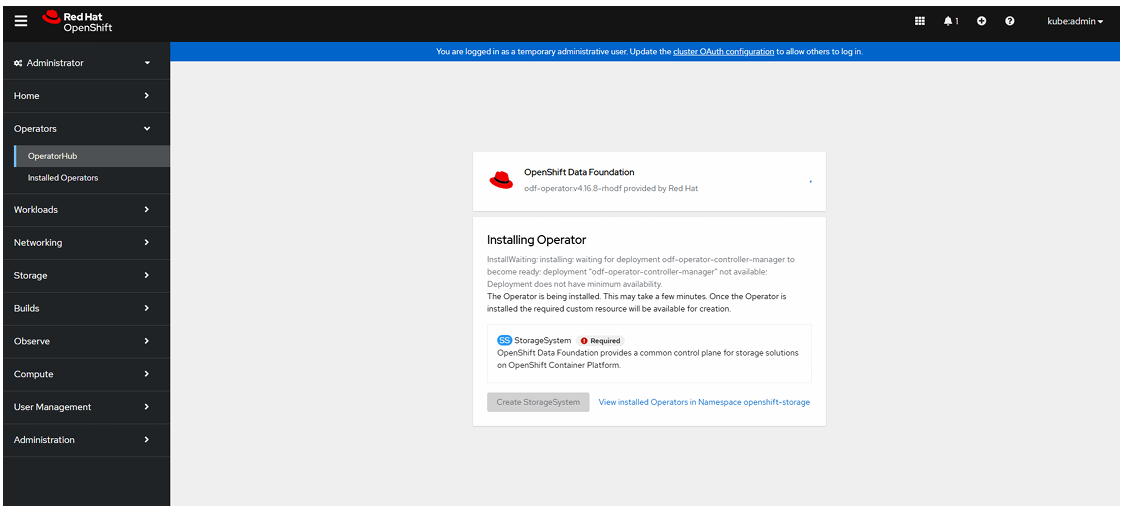
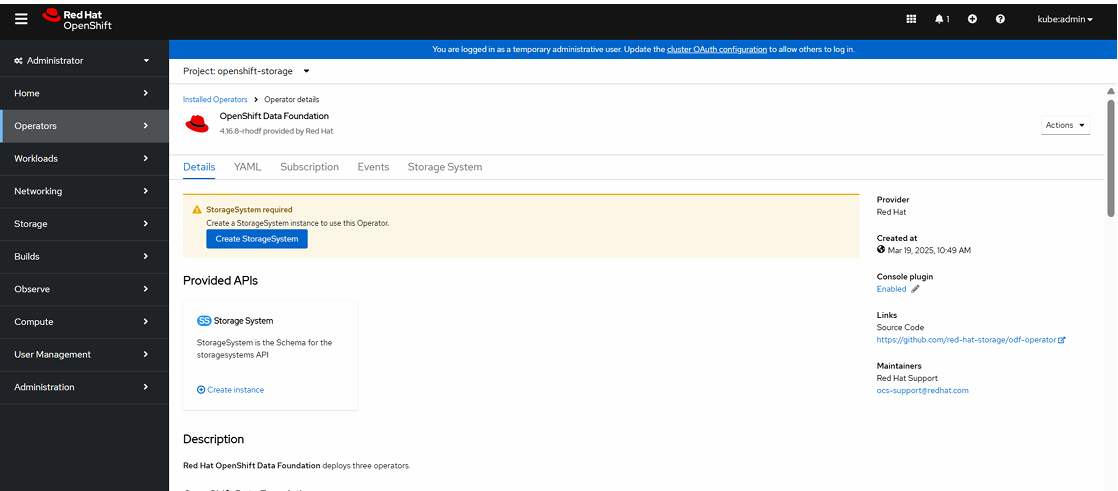
To Create a StorageSystem:
Click Create StorageSystem.
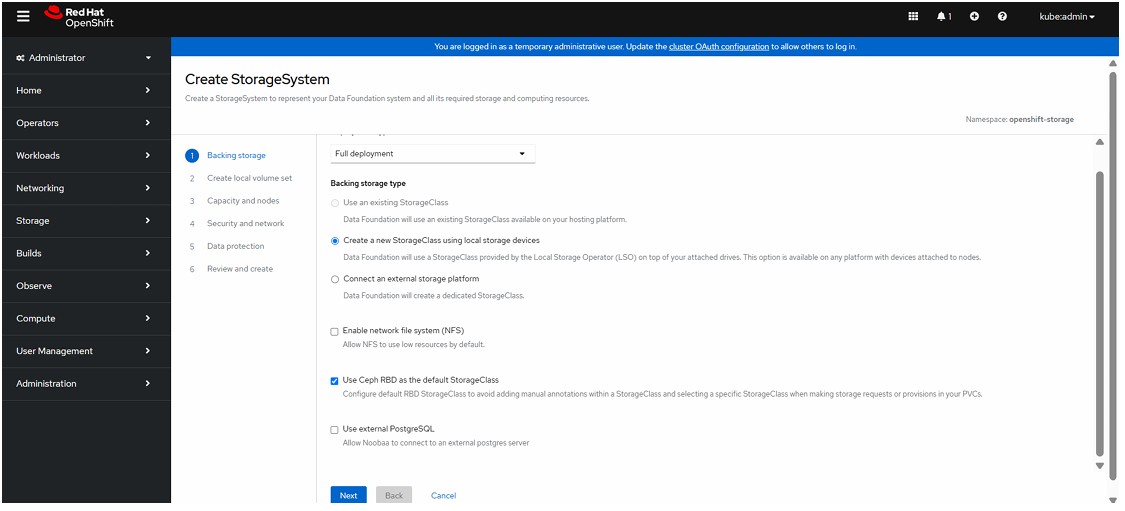
Select Full deployment , select Create a new StorageClass using local storage devices and click Next.
Enter LocalVolumeSet name and click Next.
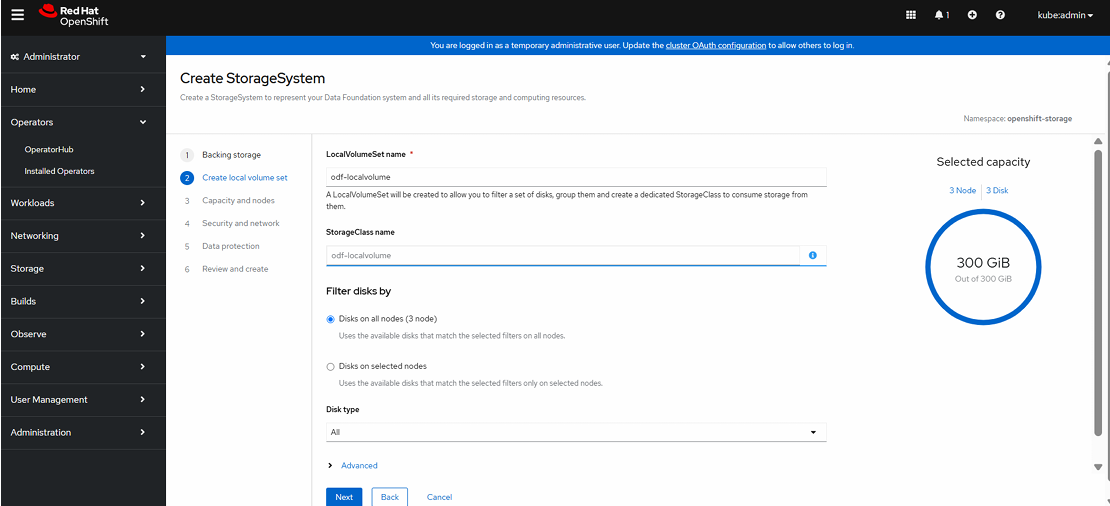
Click “Yes” to create a new LocalVolumeSet.
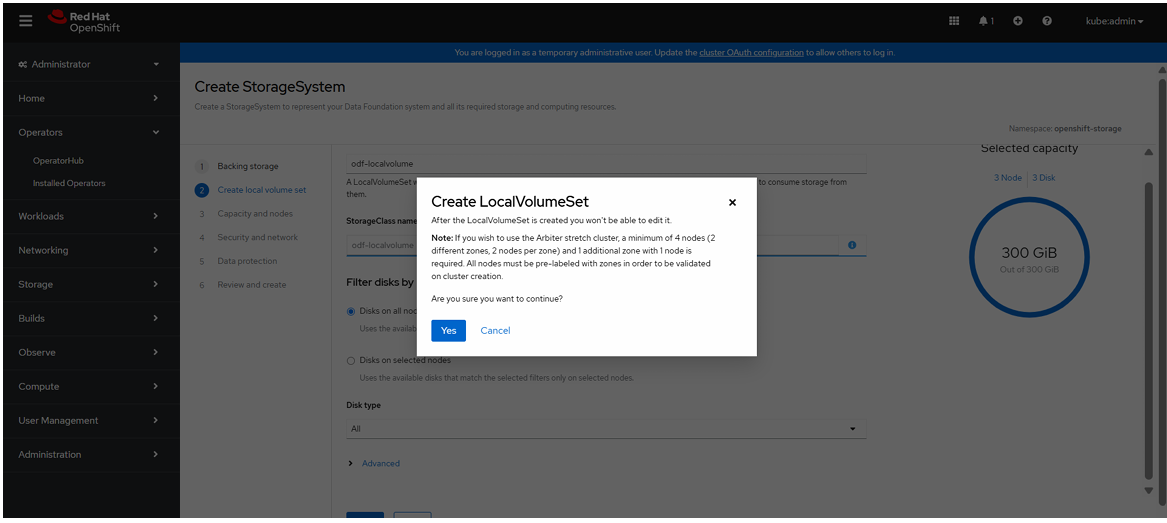
Click Next

Click Network at Default(OVN).
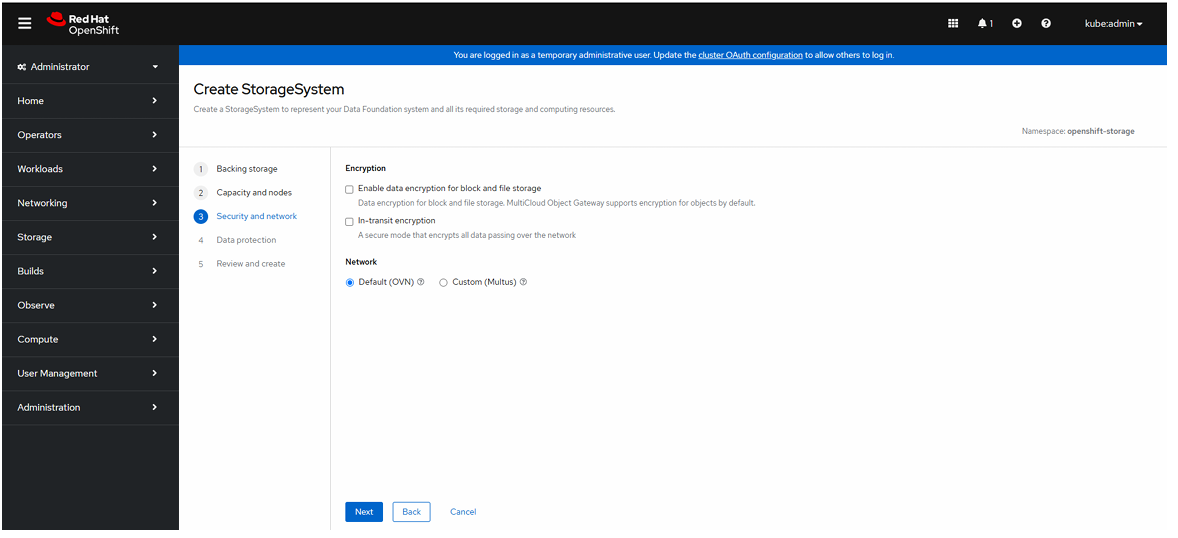
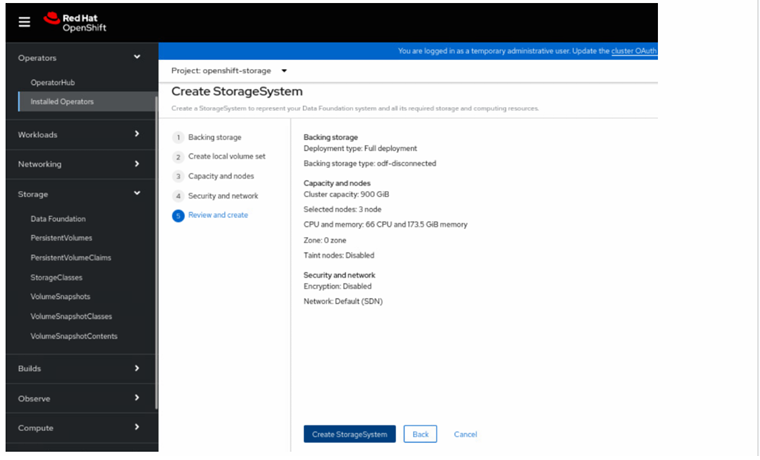
Review the configuration and click create storage system.
After Click CreateStorage System necessary pods will be created under openshift-storage name space.
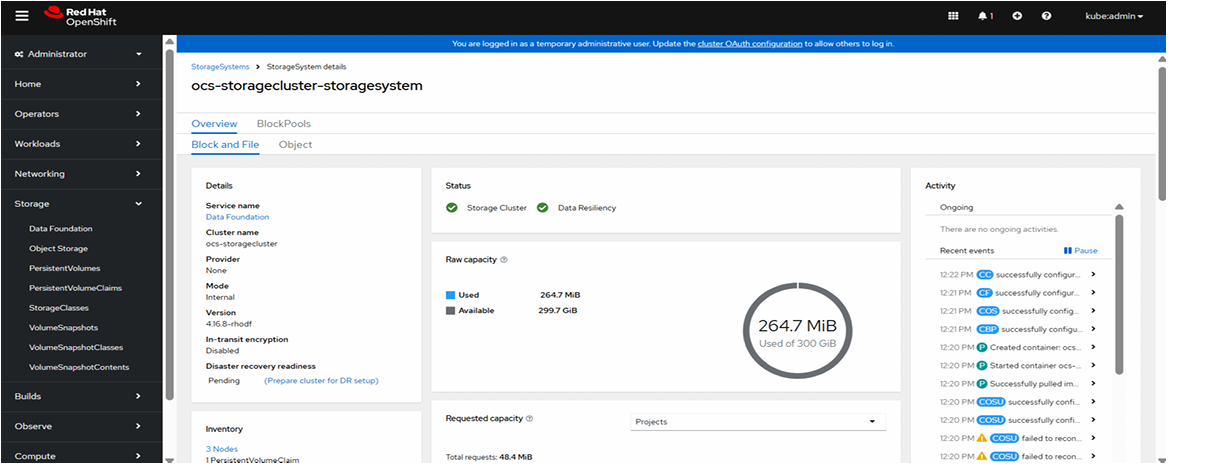
See the storage system creation status in GUI.
To verify storage system status is “Ready” state.
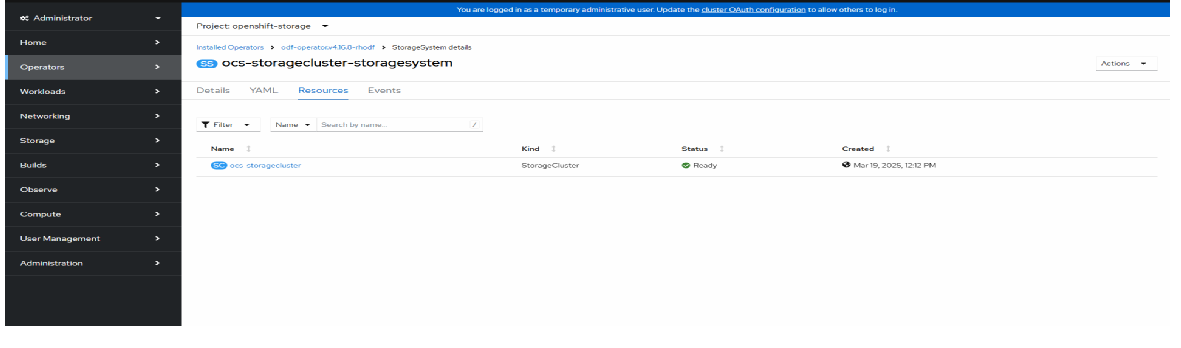
To see the Storage System status in the GUI console.
Openshift Virtualization Configuration
It is used to run Virtual Machines (VMs) inside an OpenShift cluster along with containers.
Installing OpenShift Virtualization Operator:
Go to Ecosystem→ Software Catalog→ search Openshift Virtualization.

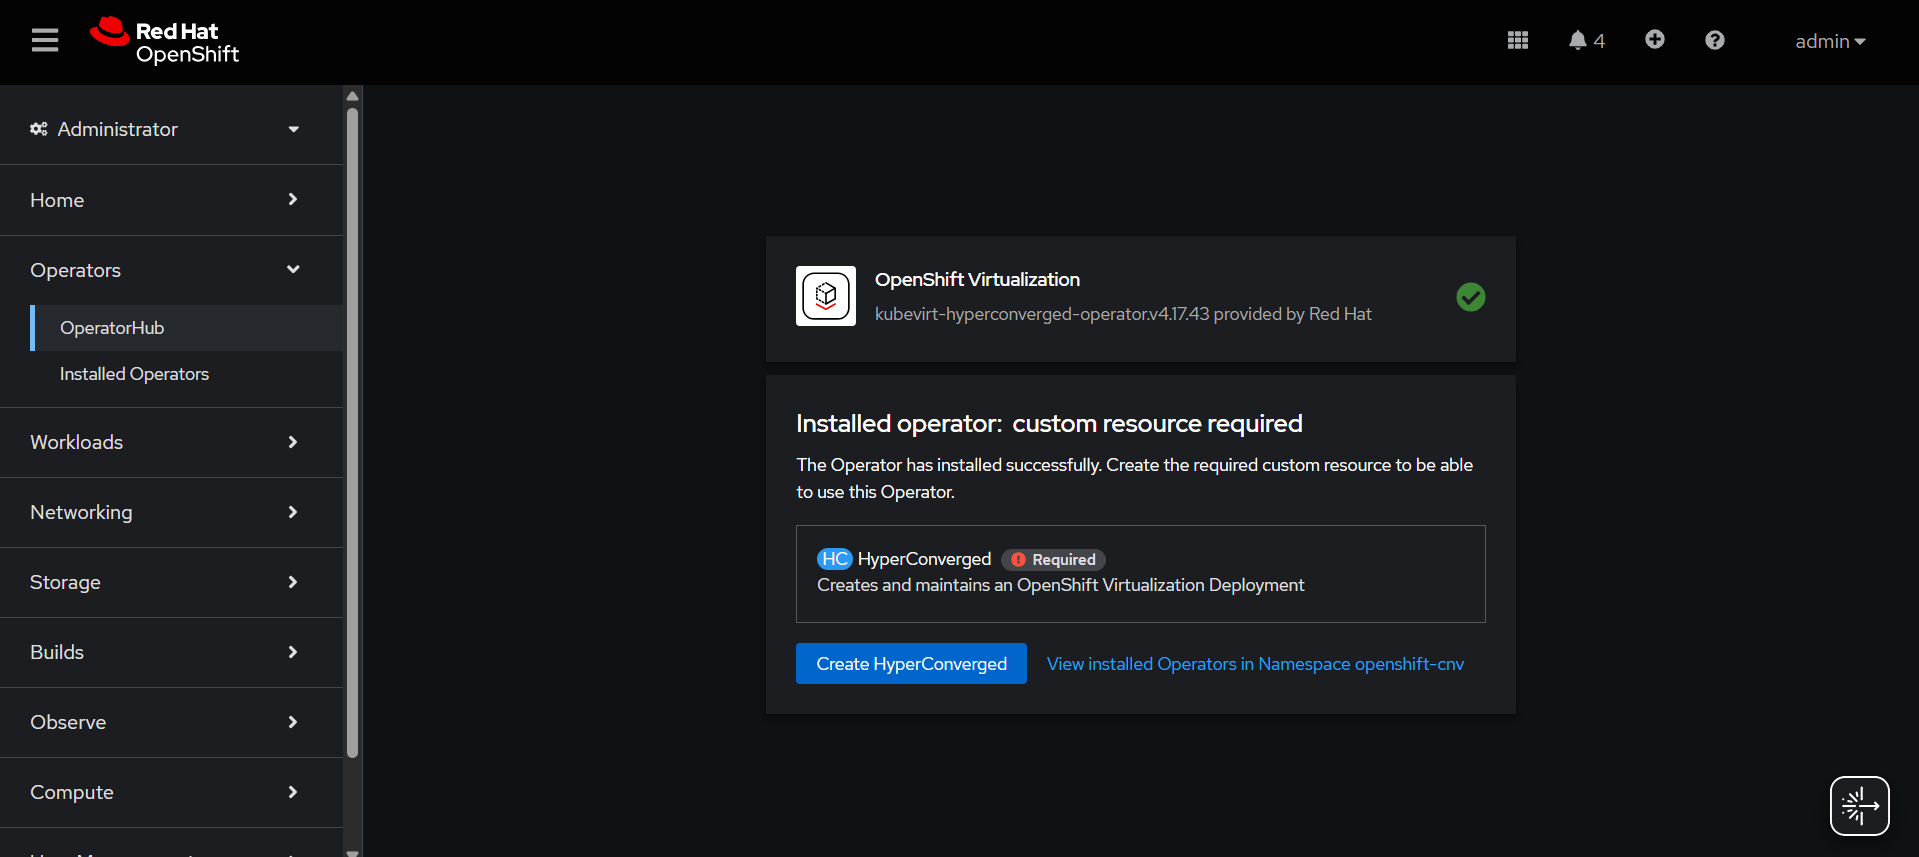
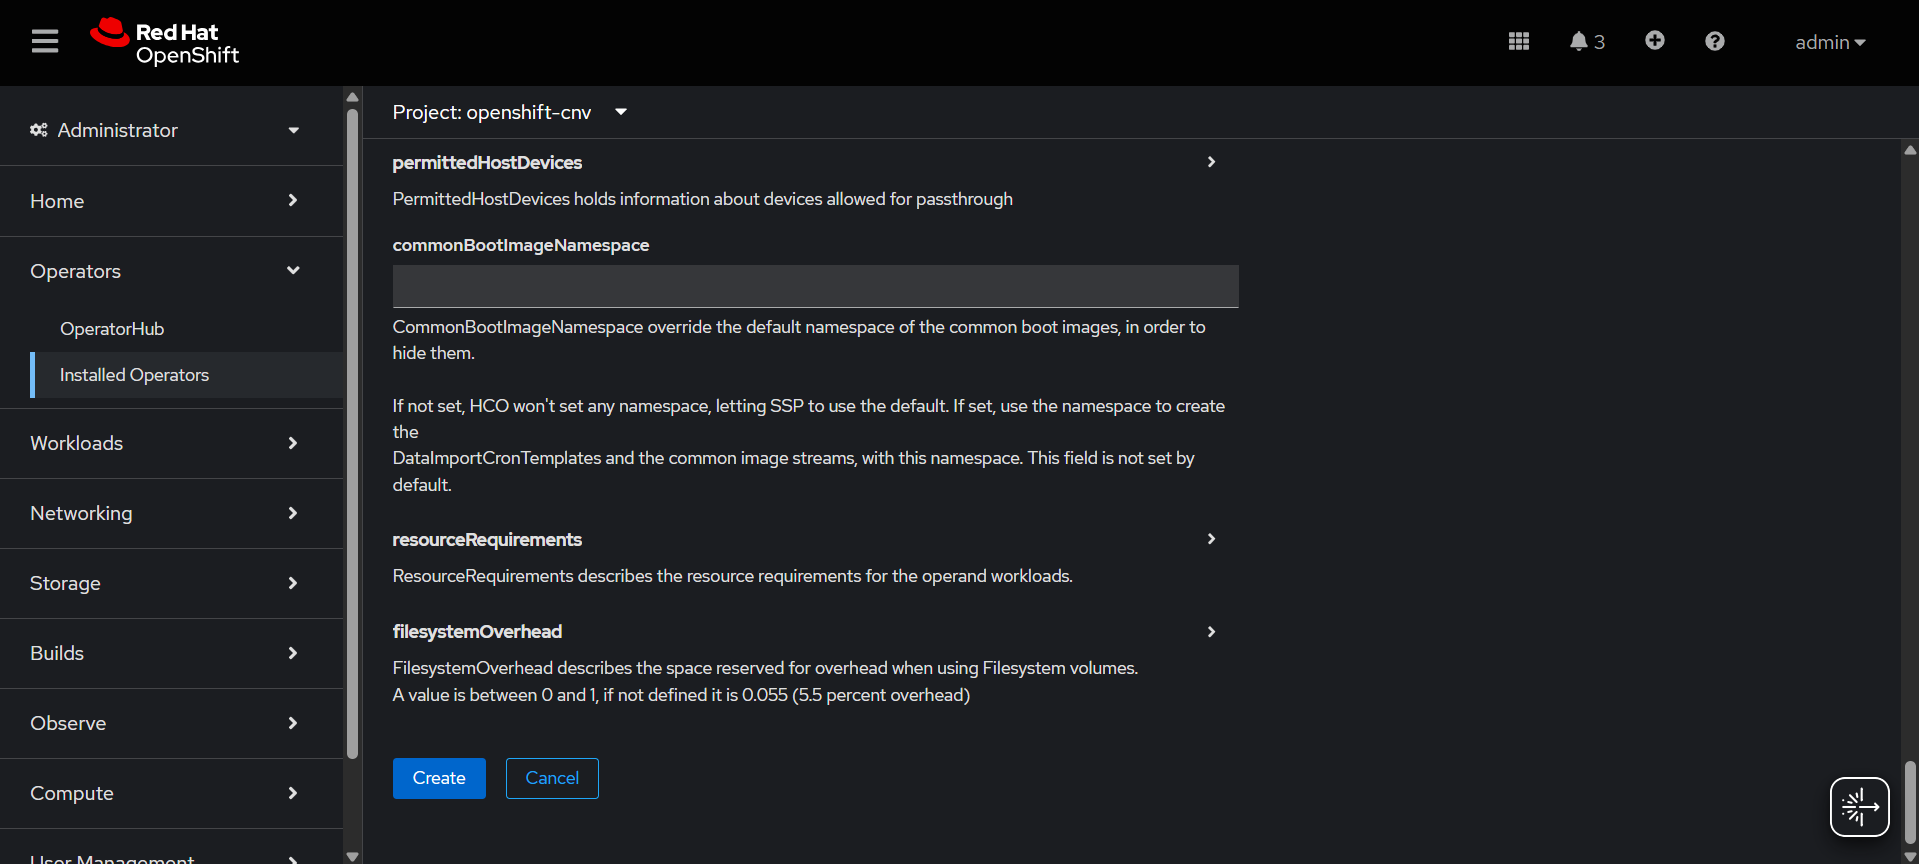
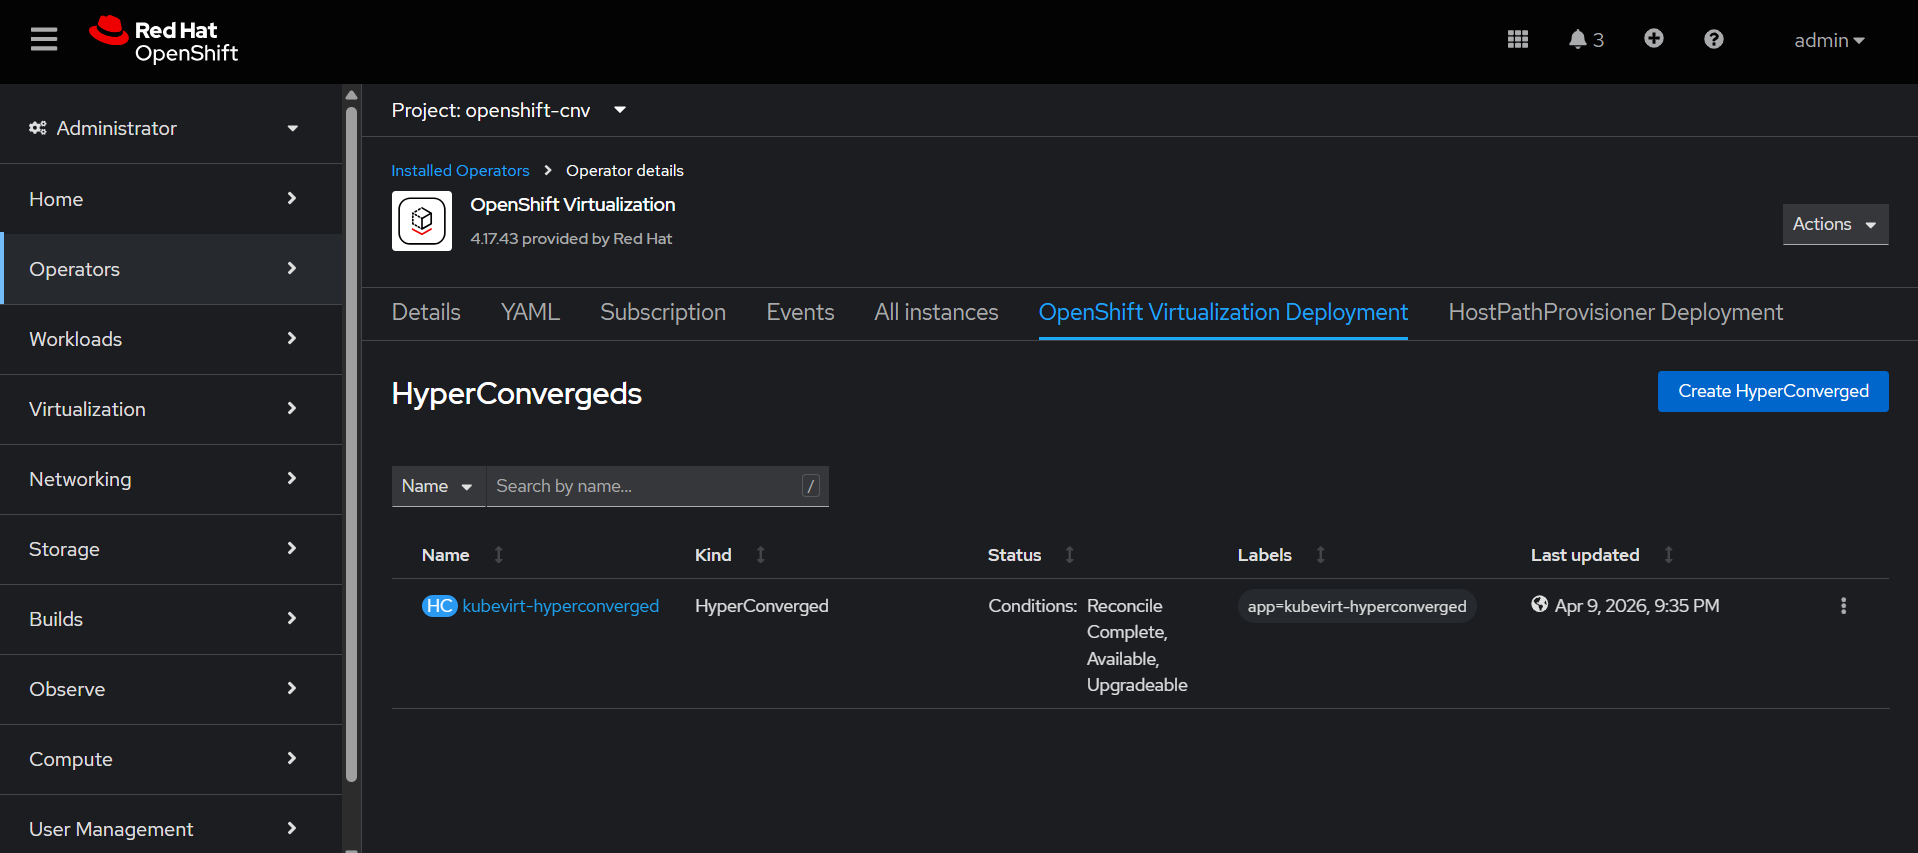
Create HyperConverged.
NMState Operator Configuration
This operator is used to configure and manage node-level networking in OpenShift in a declarative way.
It manages:
1. Interfaces
2. Bridges
3. VLANs
4. Bonds
5. IP addresses
6. Routes
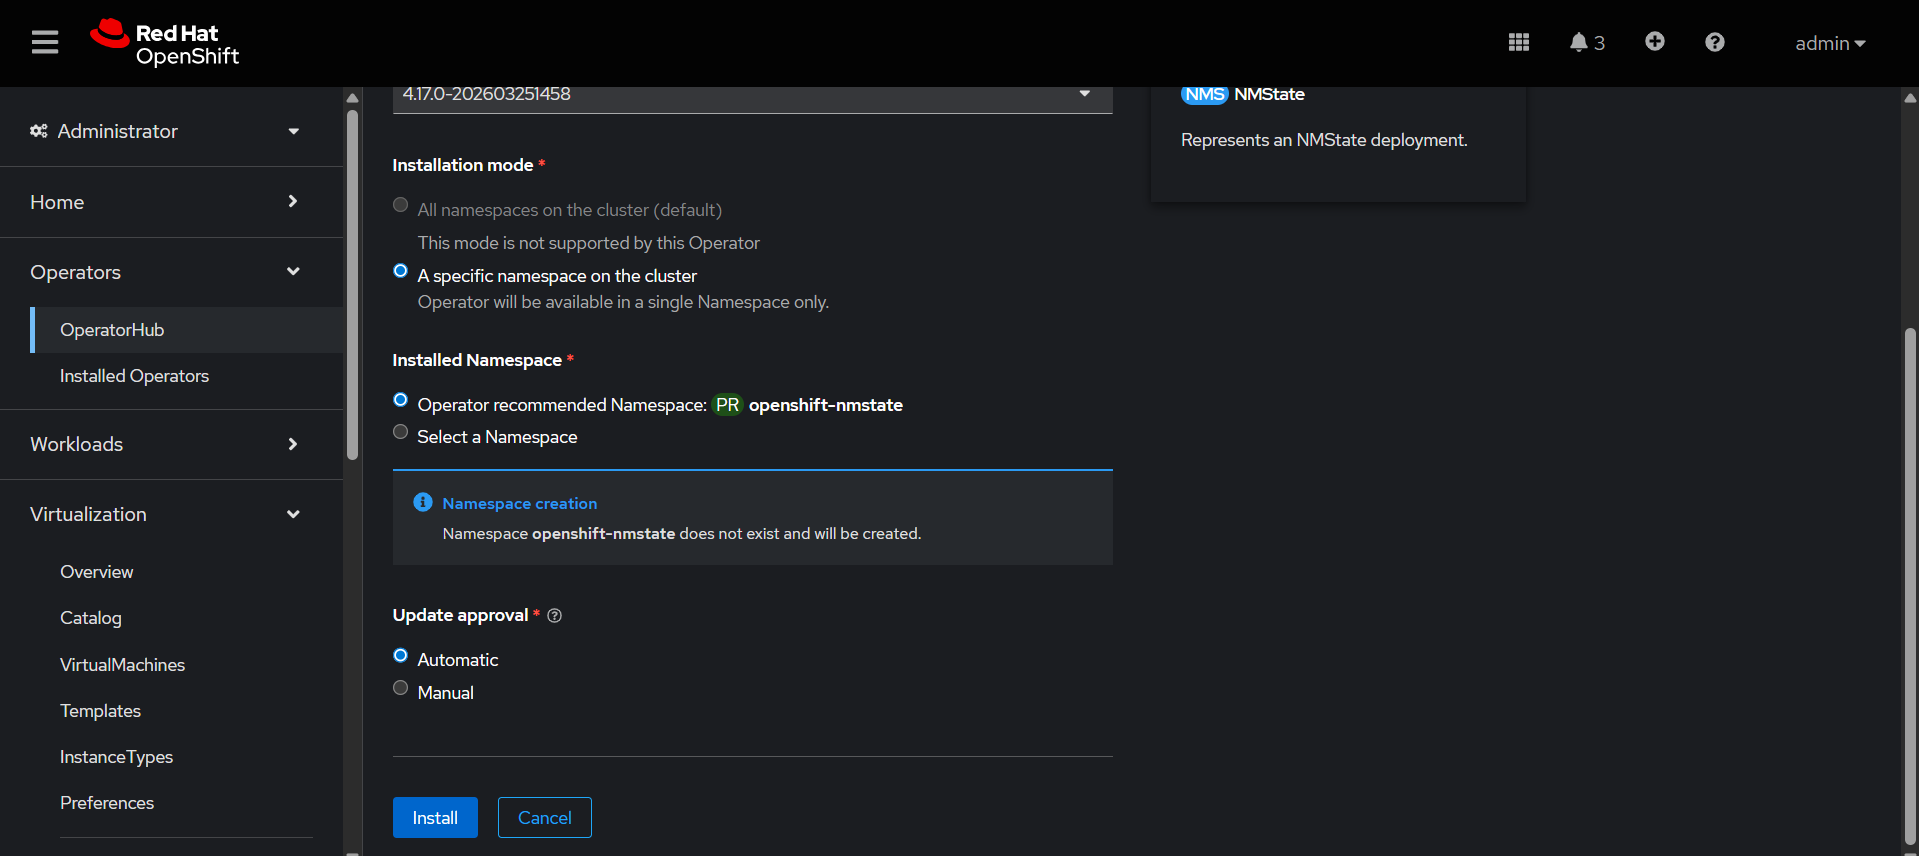
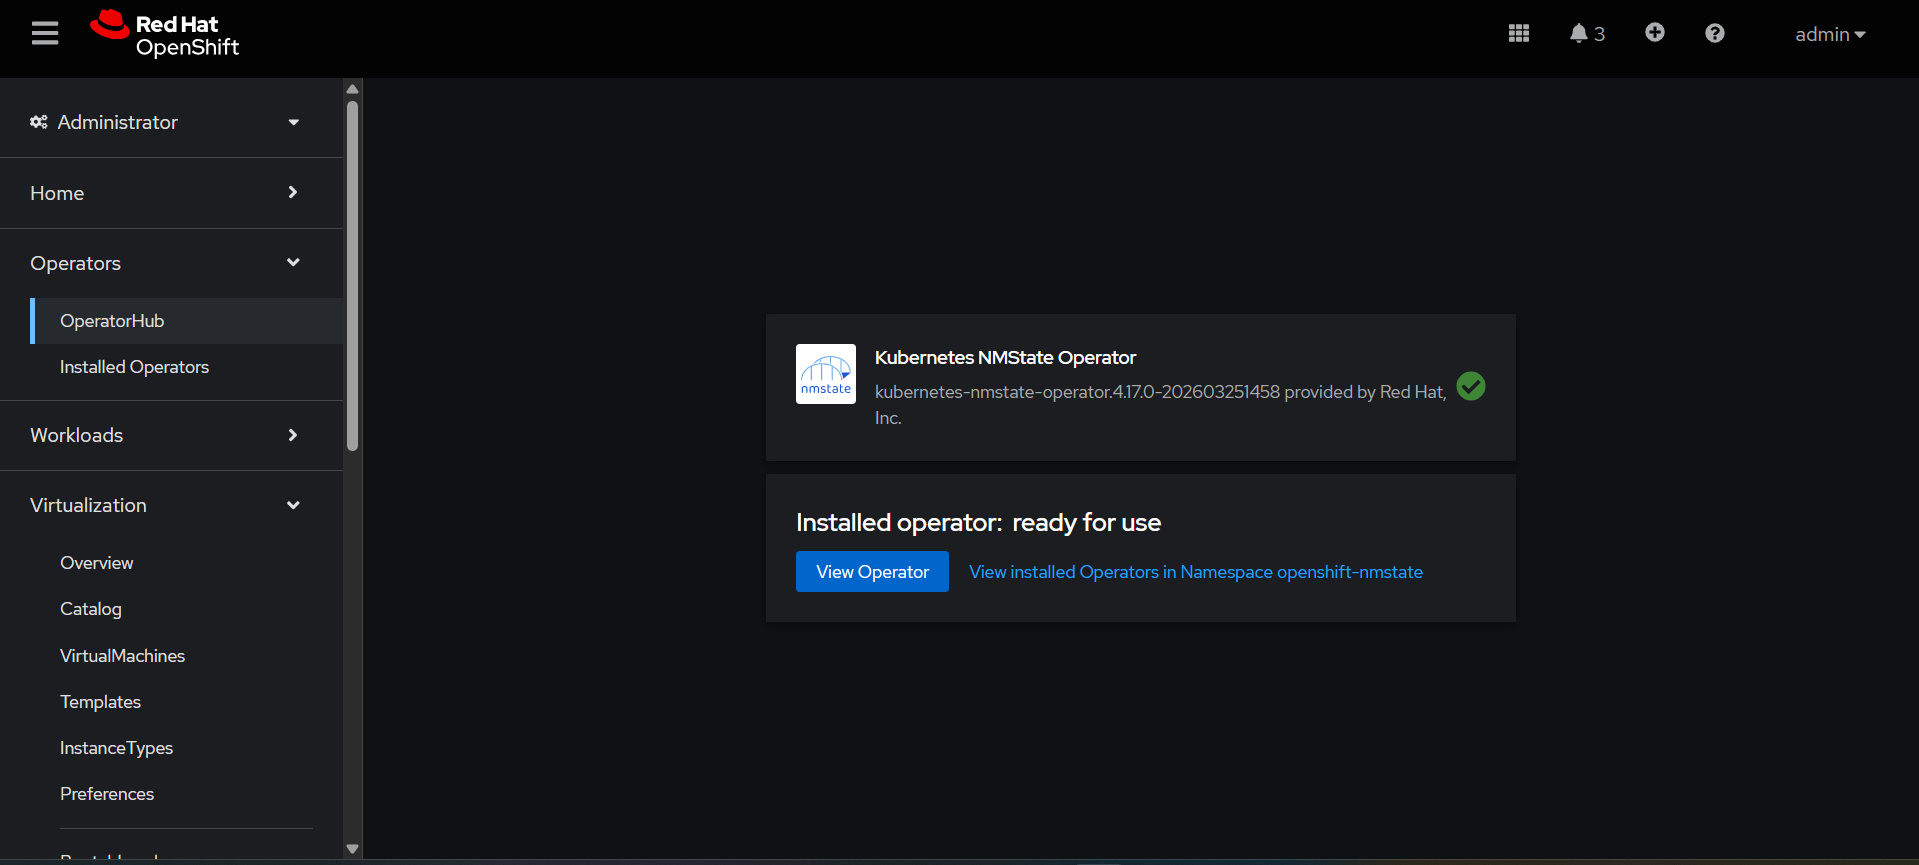
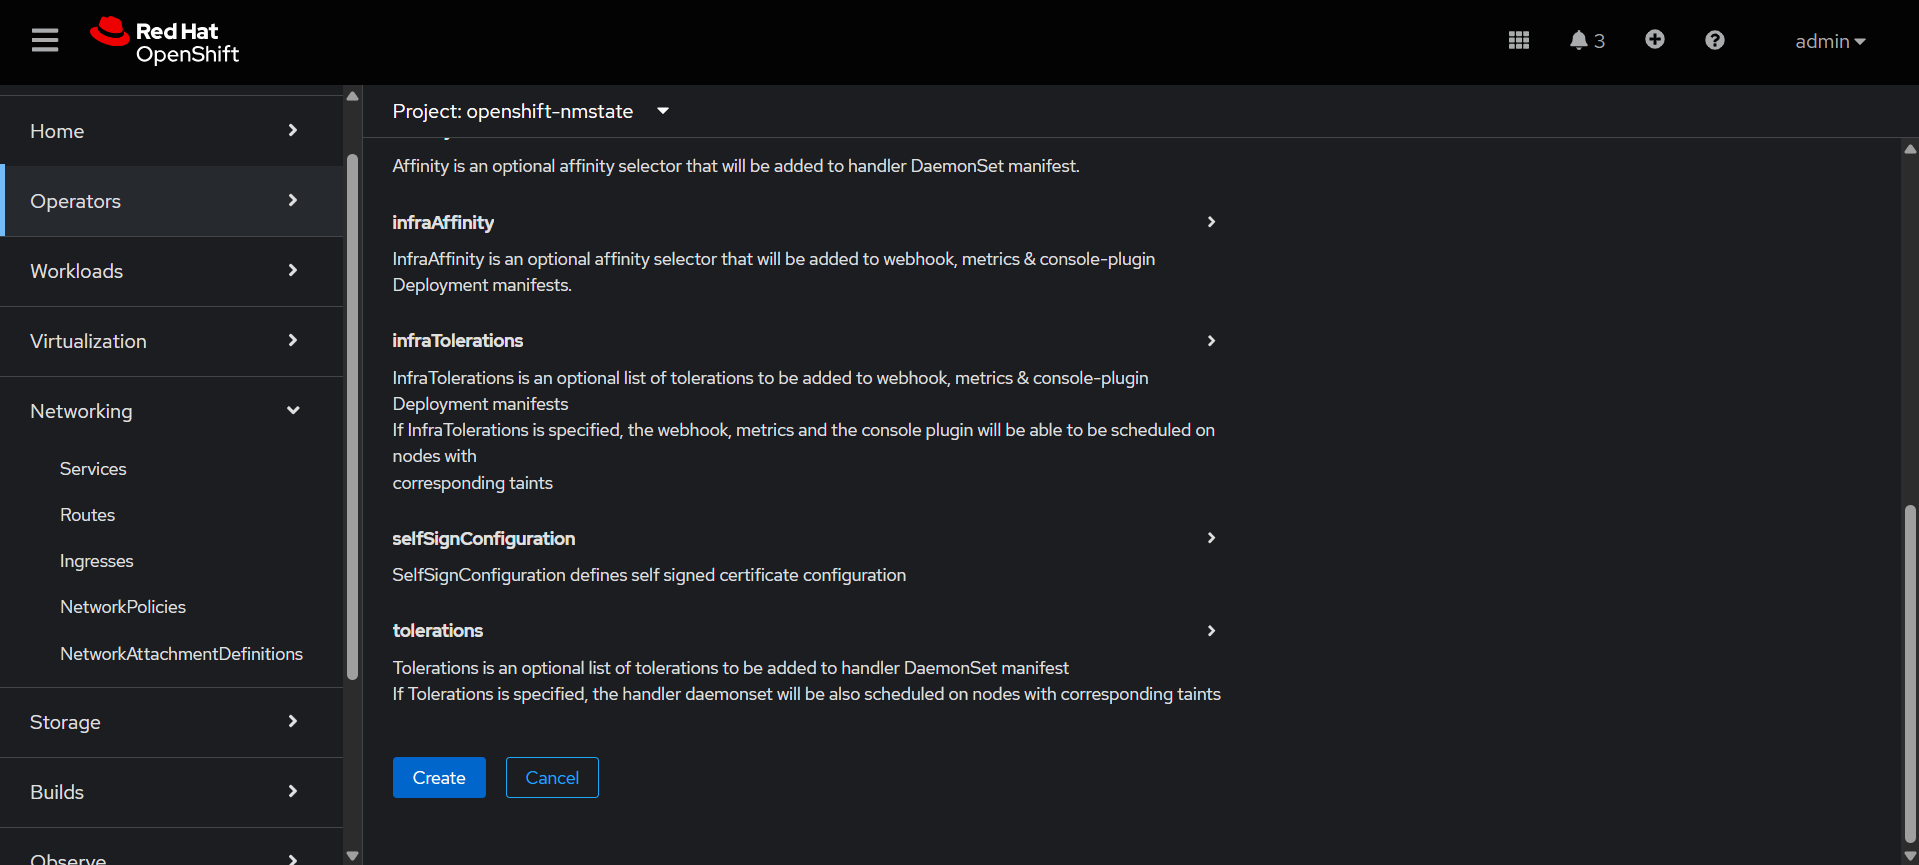
Installing NMState Operator:
Go to Ecosystem → Software Catalog→ search Kubernetes NMState Operator
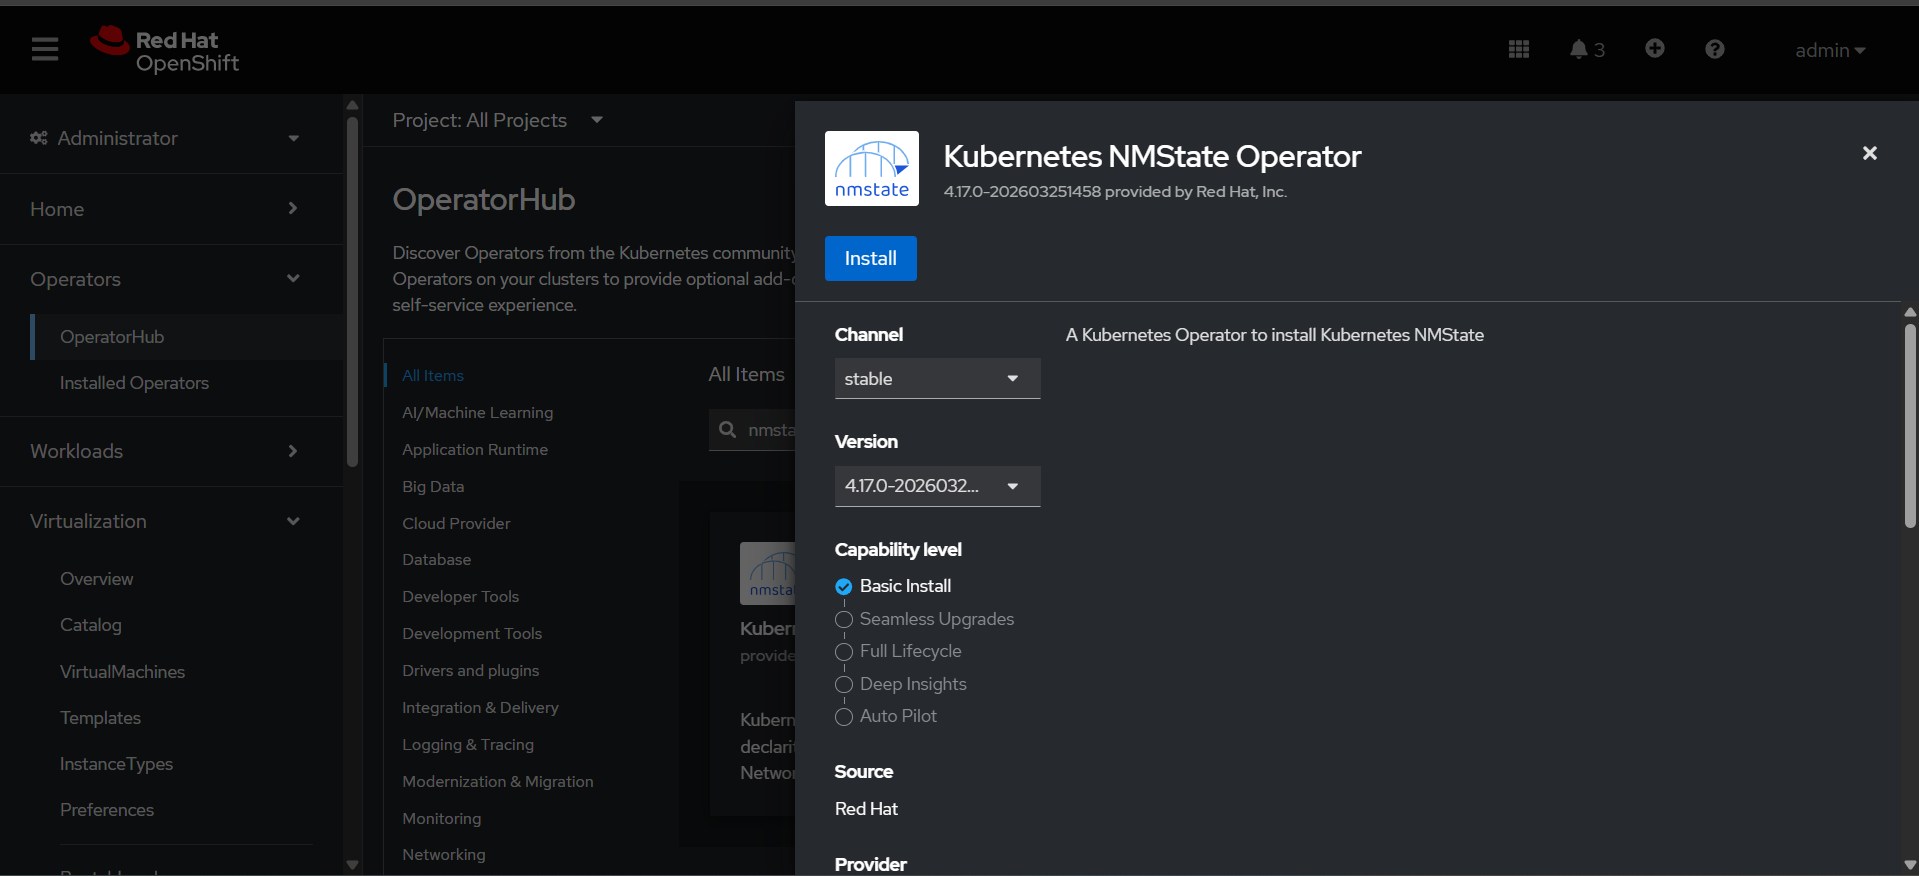
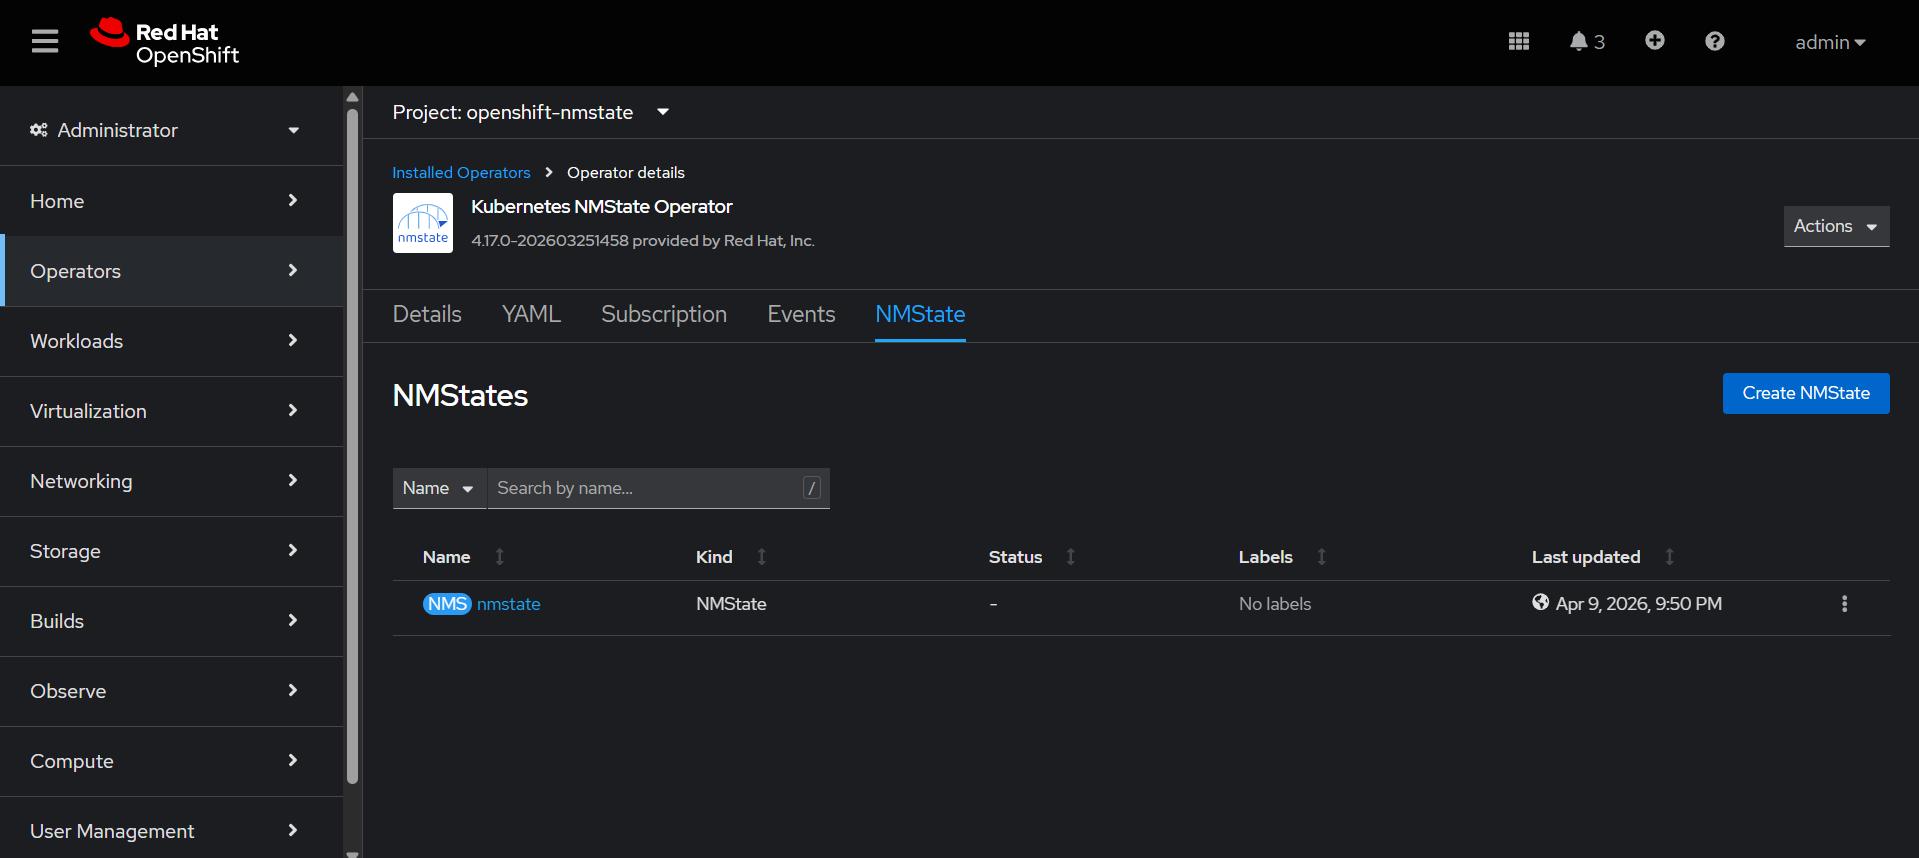
Create NMState with default Form view.
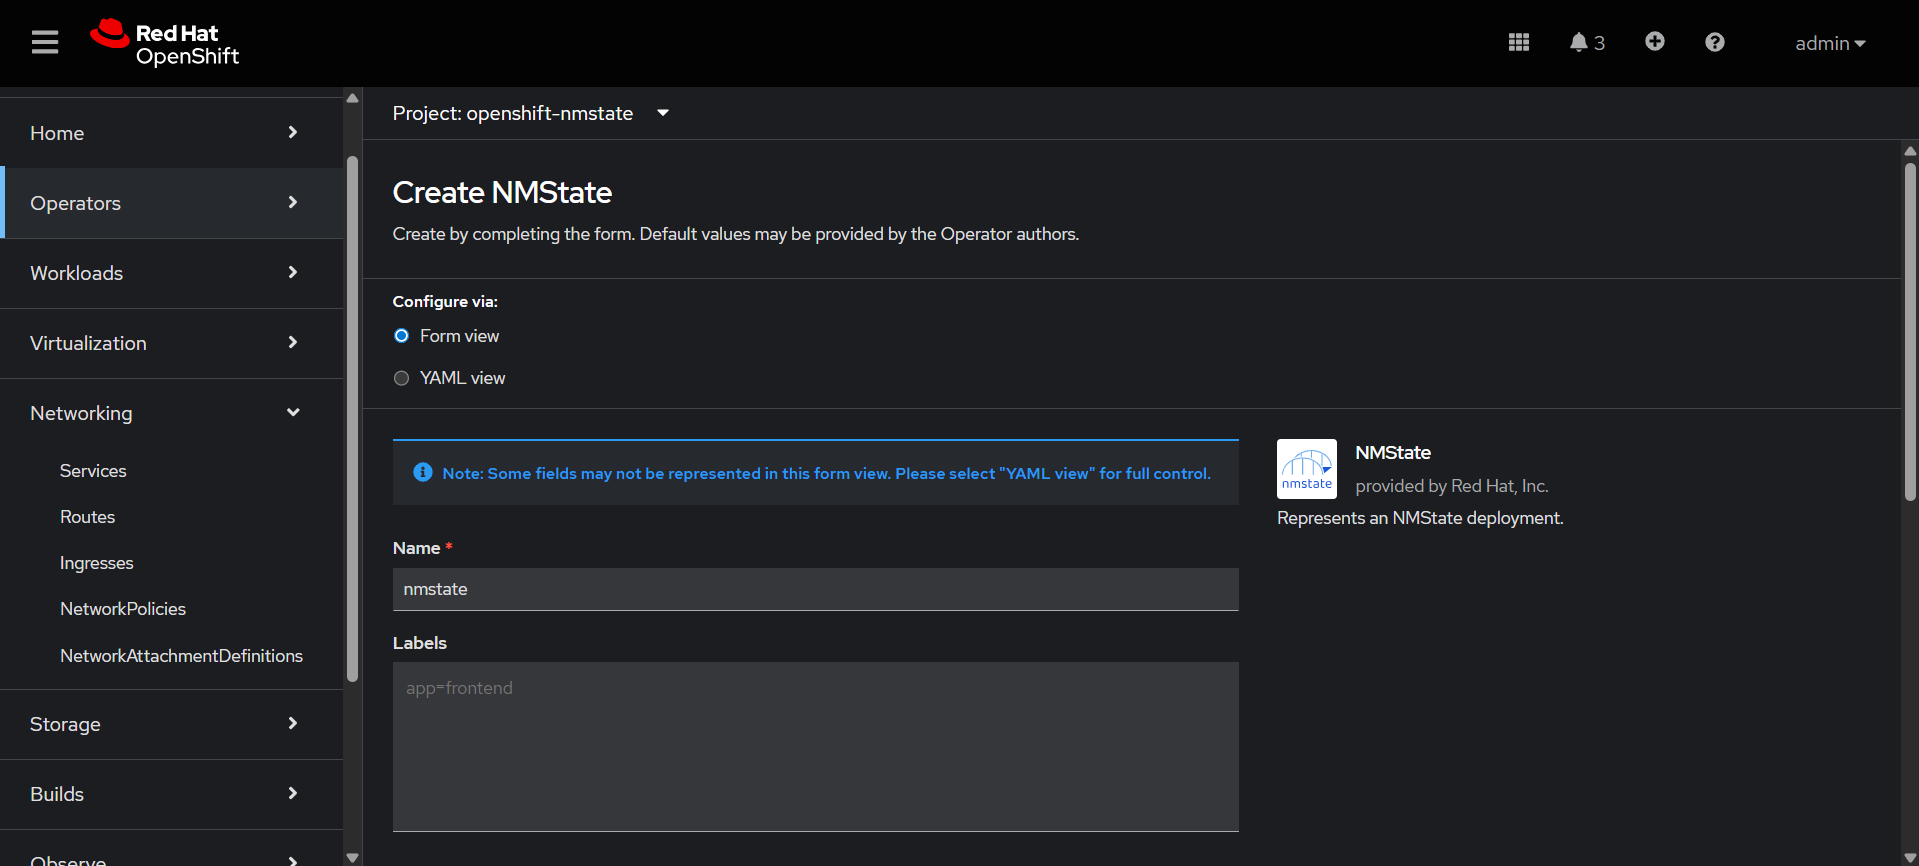
Check the nmstate is created.
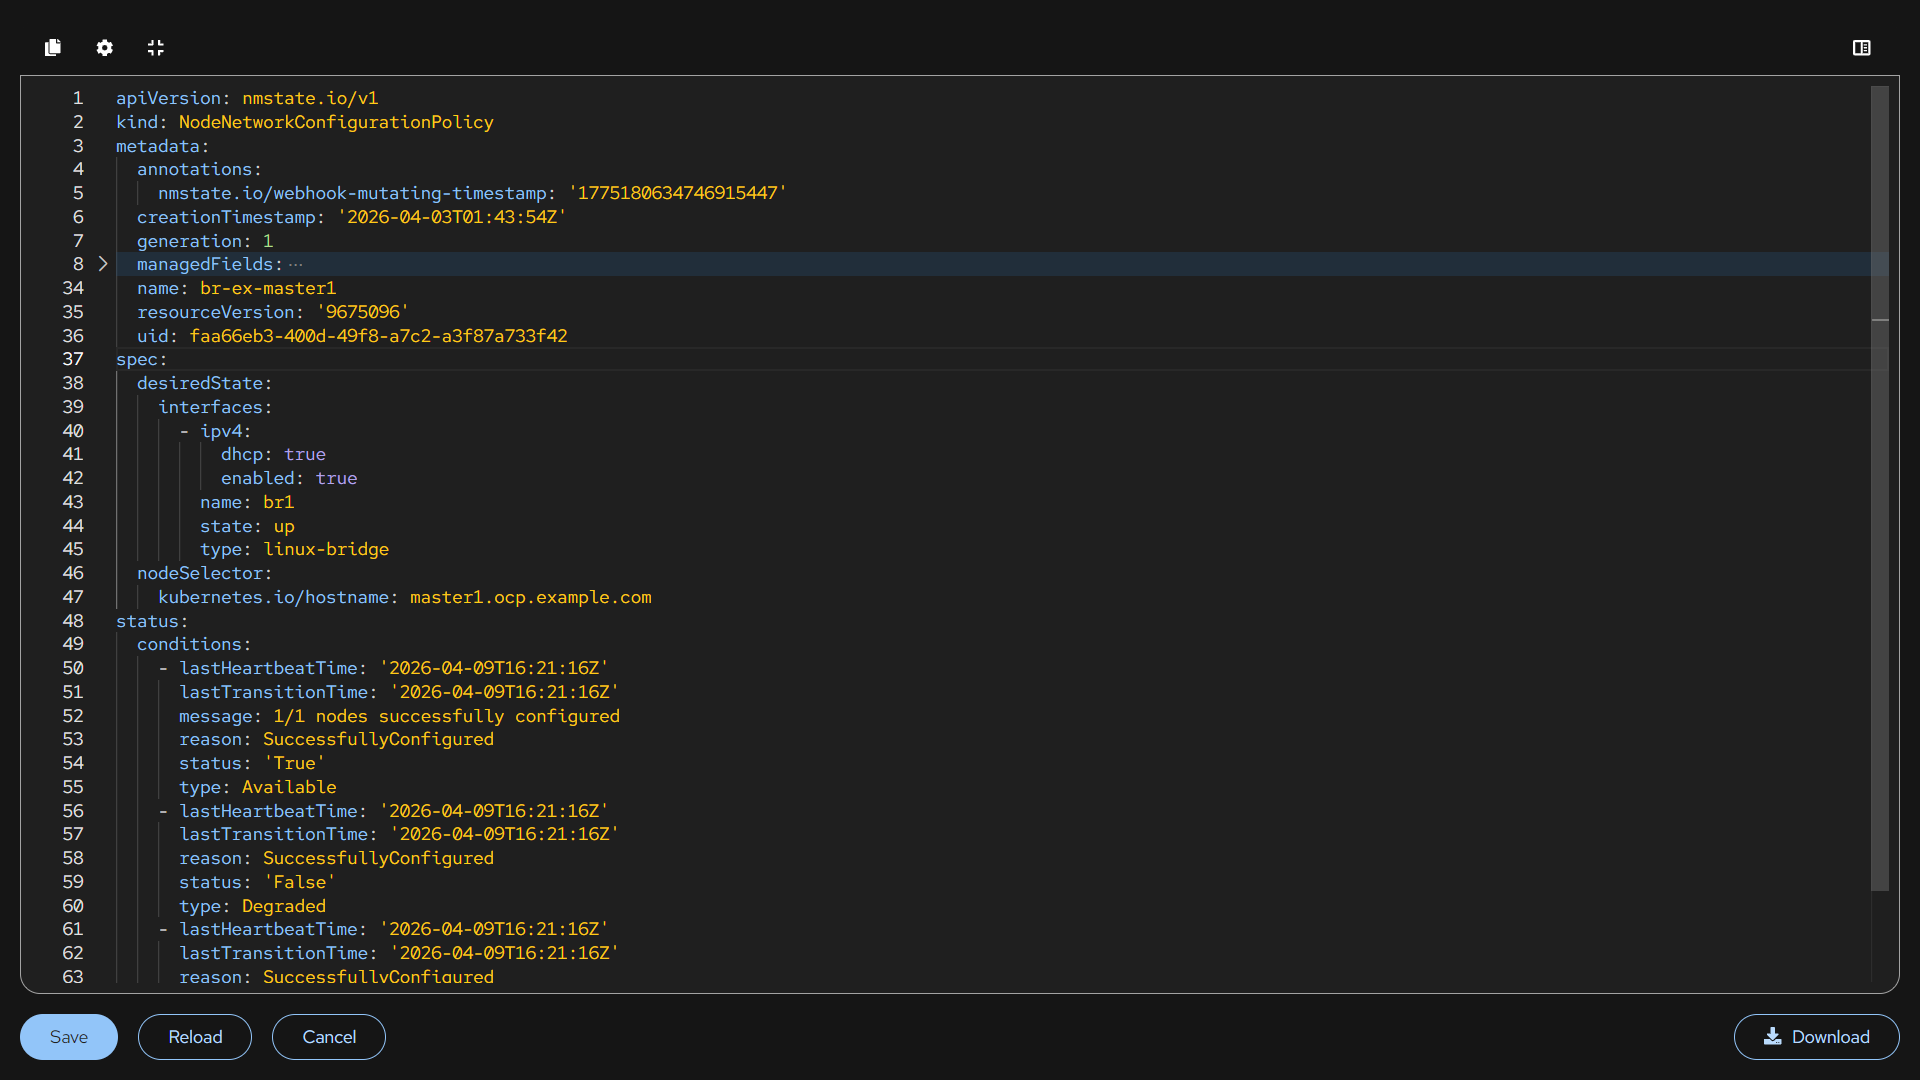
Then create the NodeNetworkConfigurationPolicy, OCPV need real network. so nncp is used to create linux bridge. Attach physical NIC to that bridge. VMs connect to bridge.
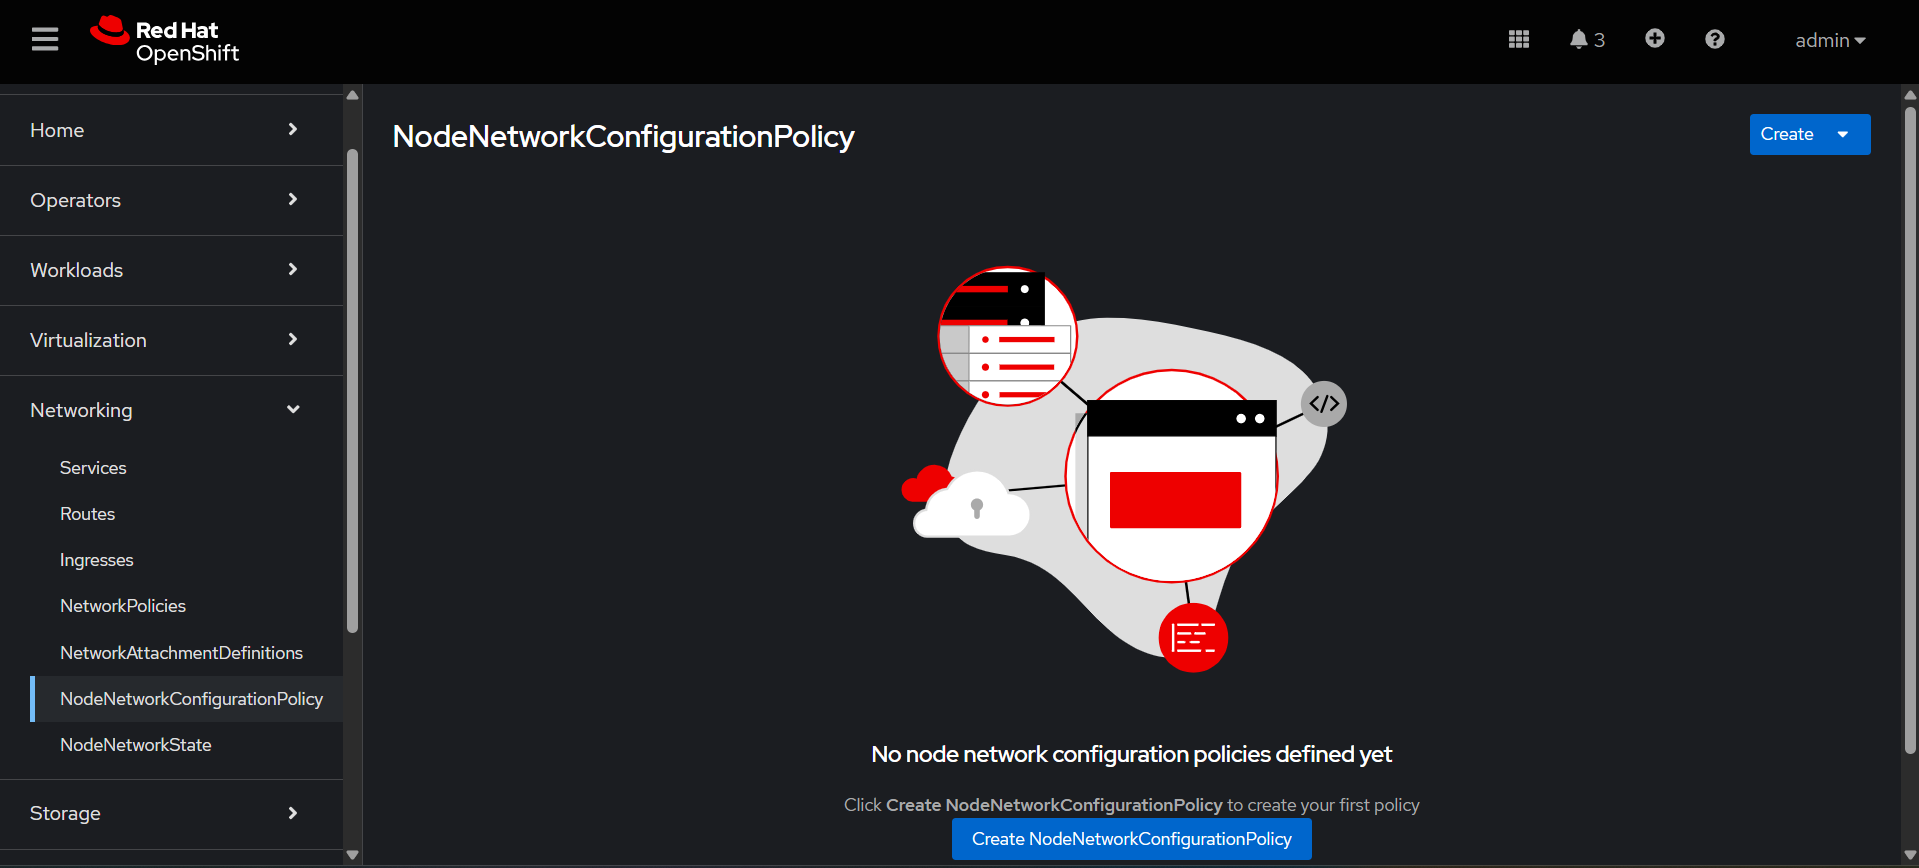
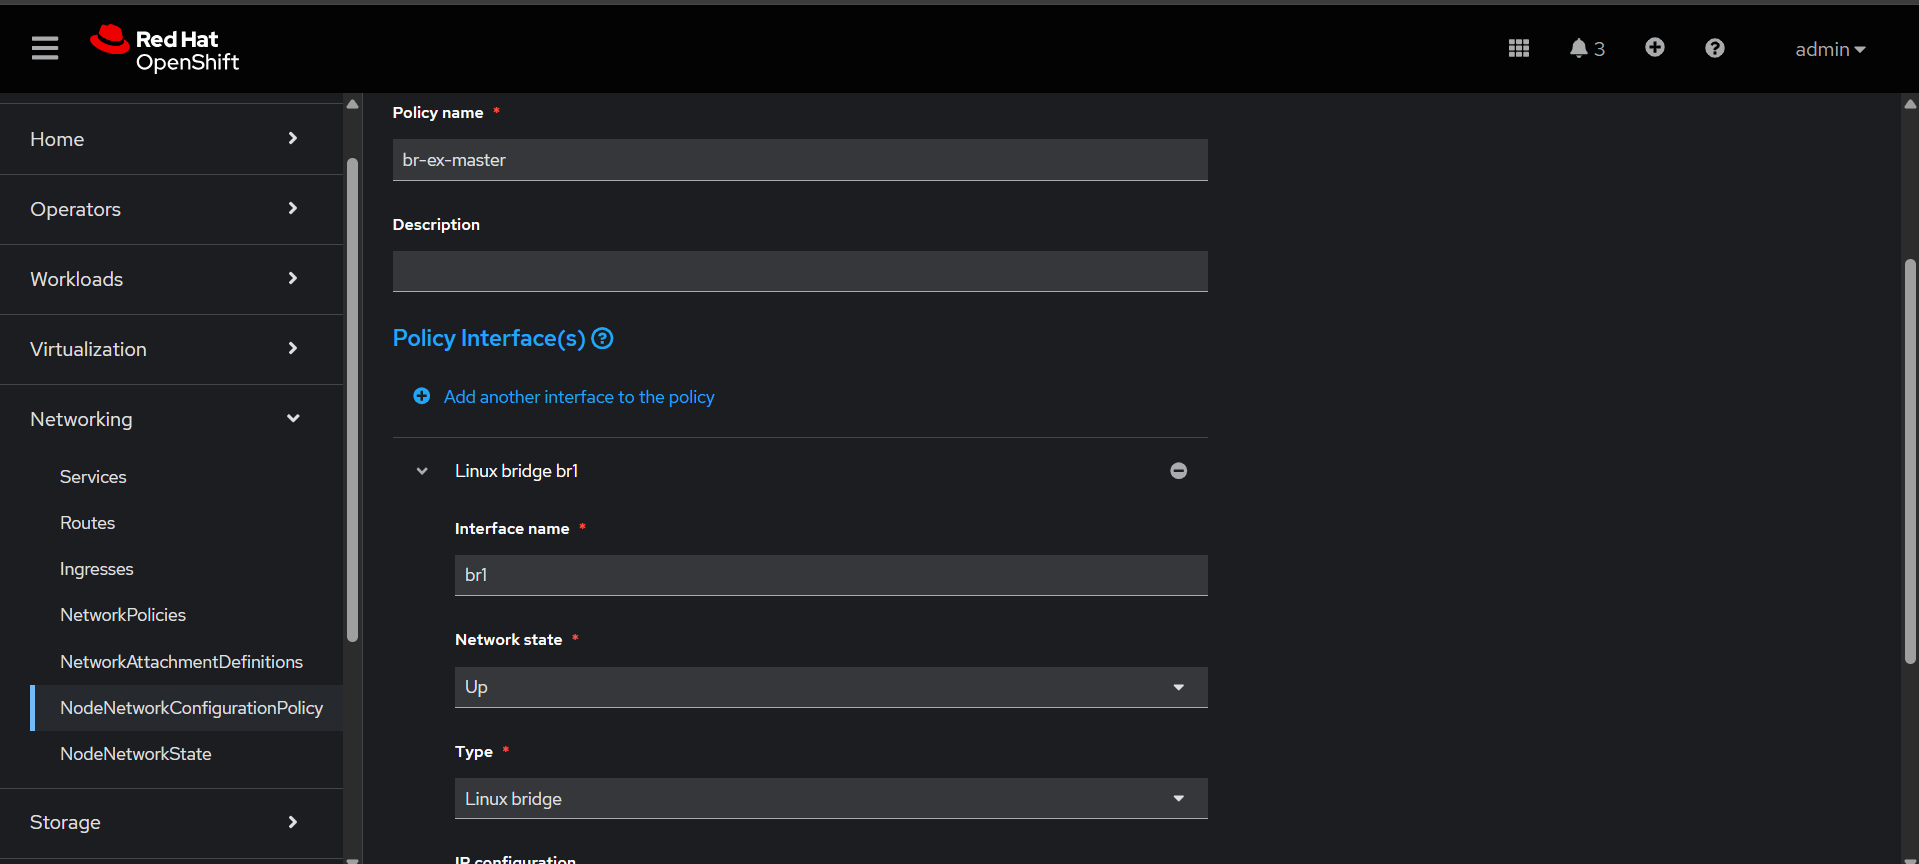
Here we have created 3 individual nncp using the node selector.

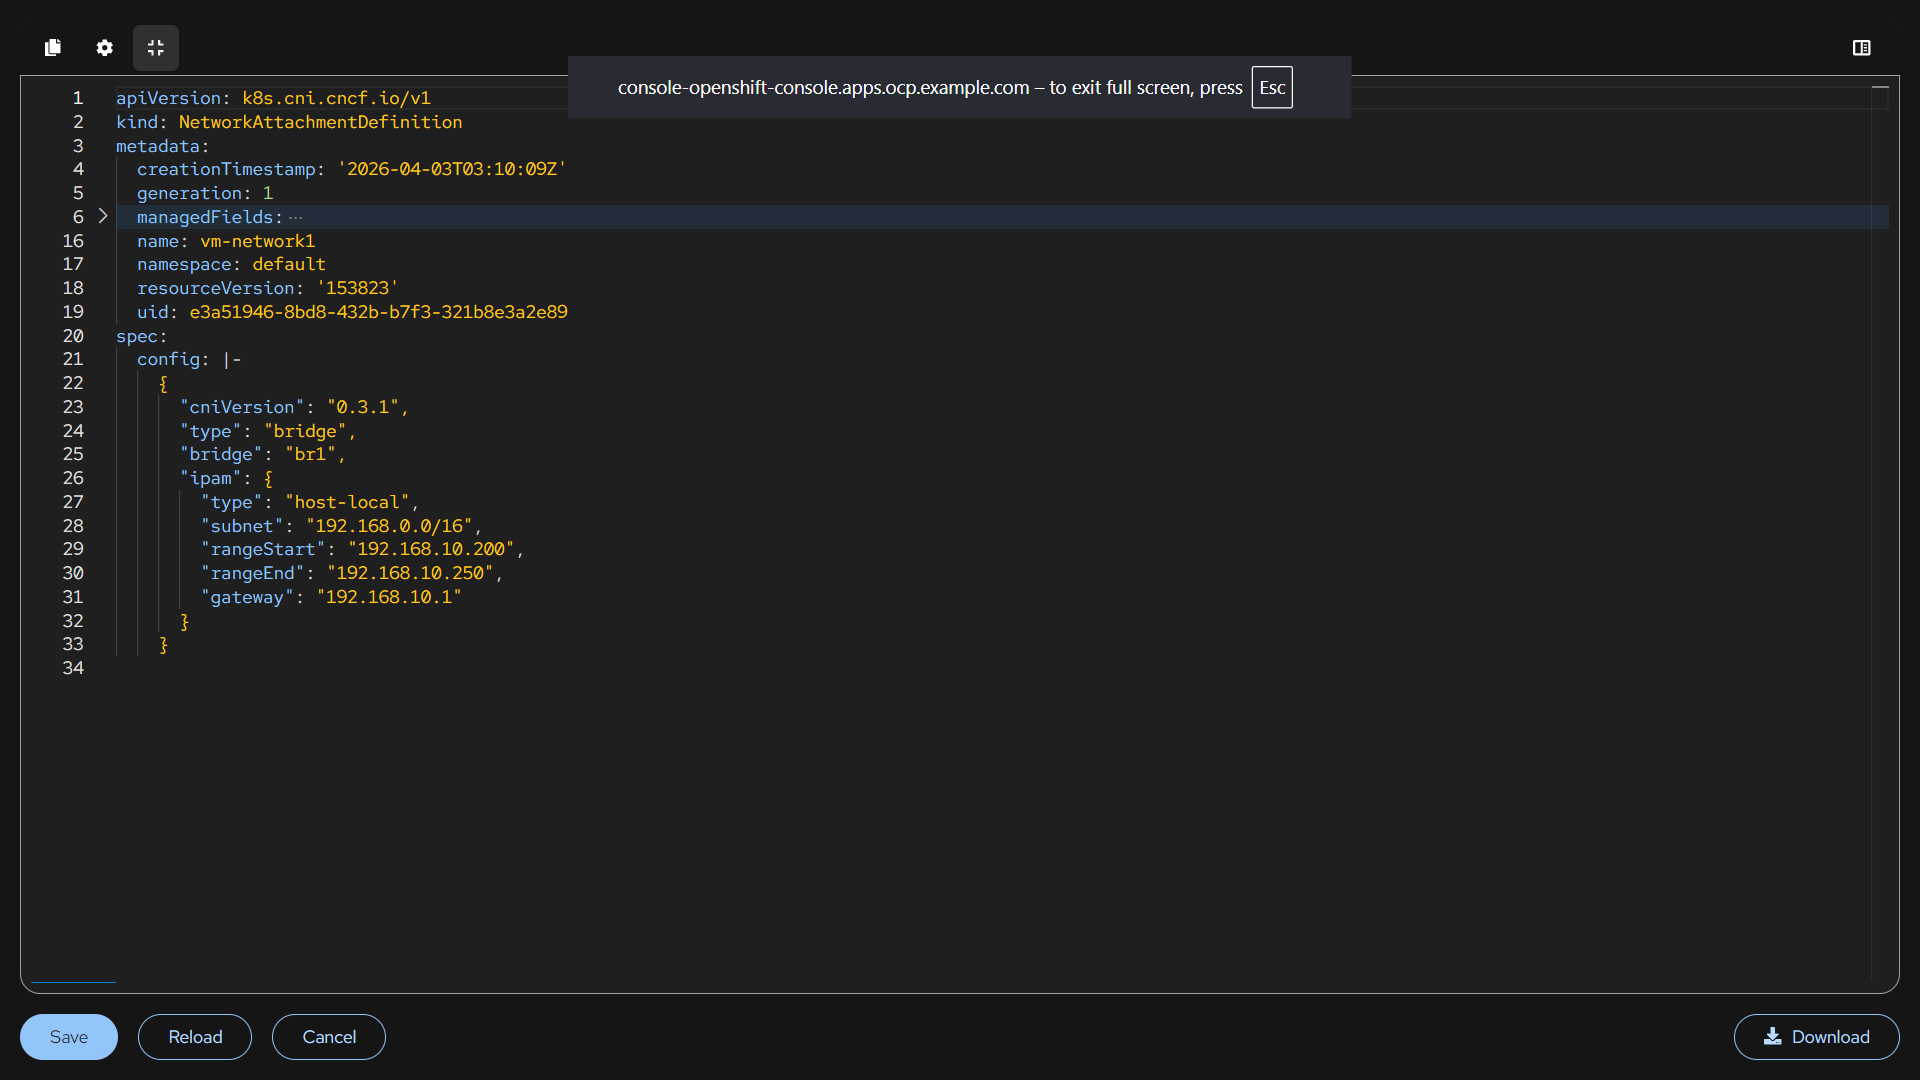
Network Attachment Definitions Configuration
We are creating multiple NAD networks options for VMs/pods.
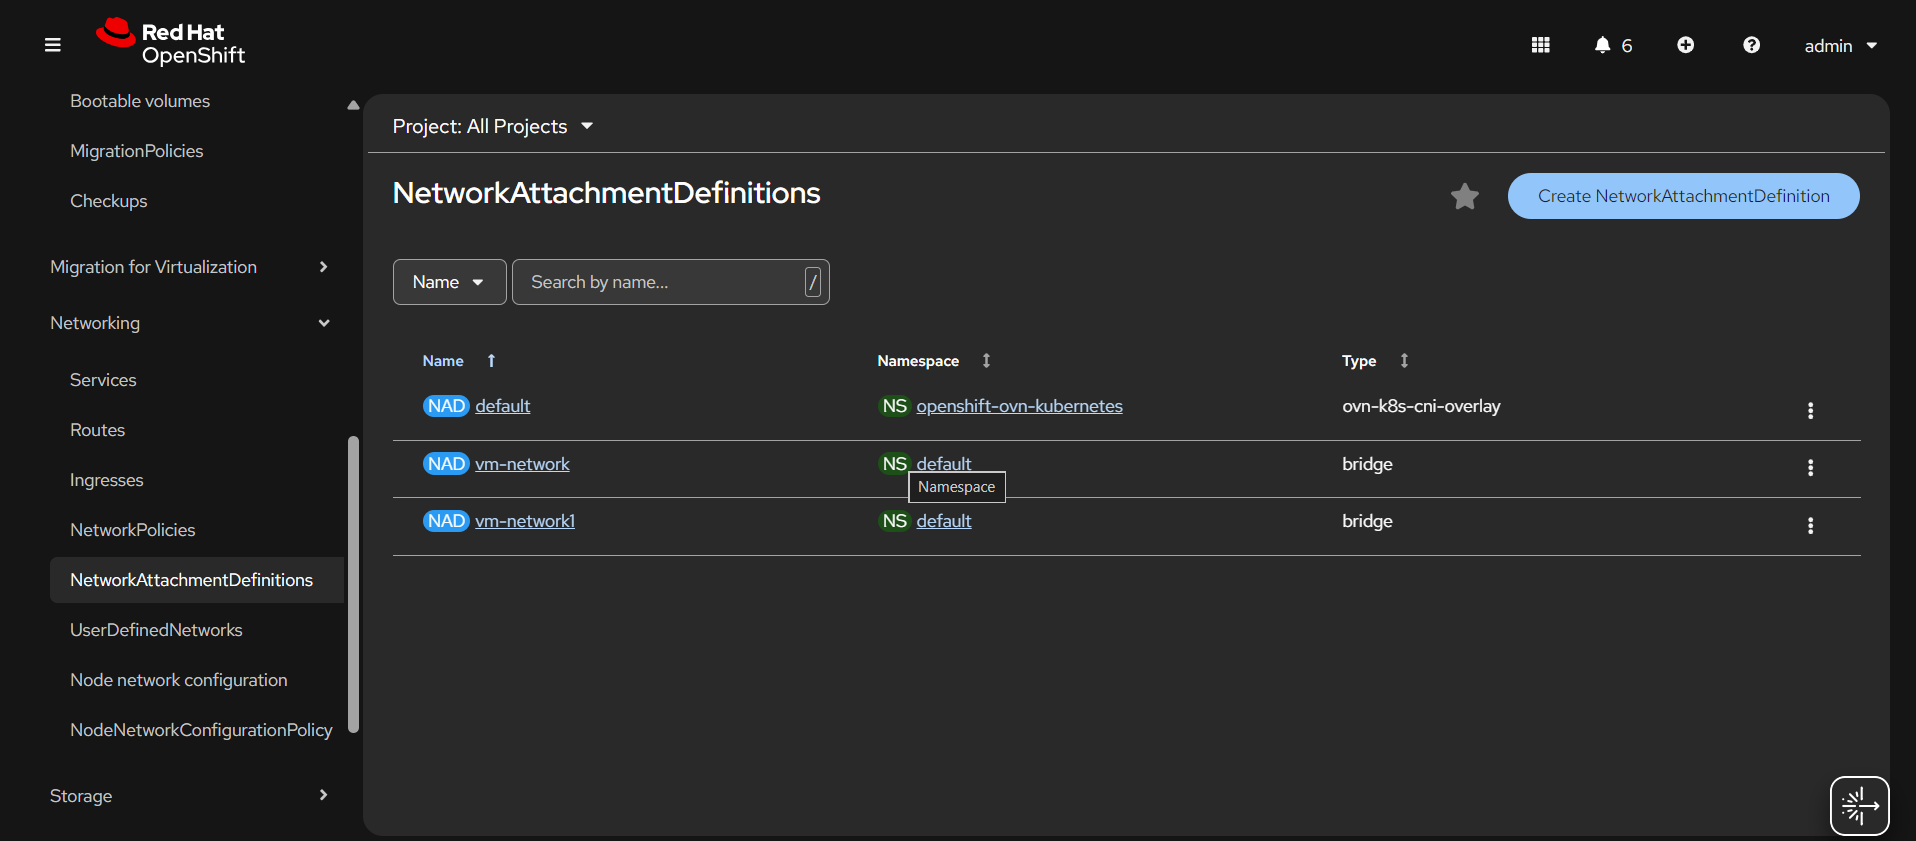
NAD:
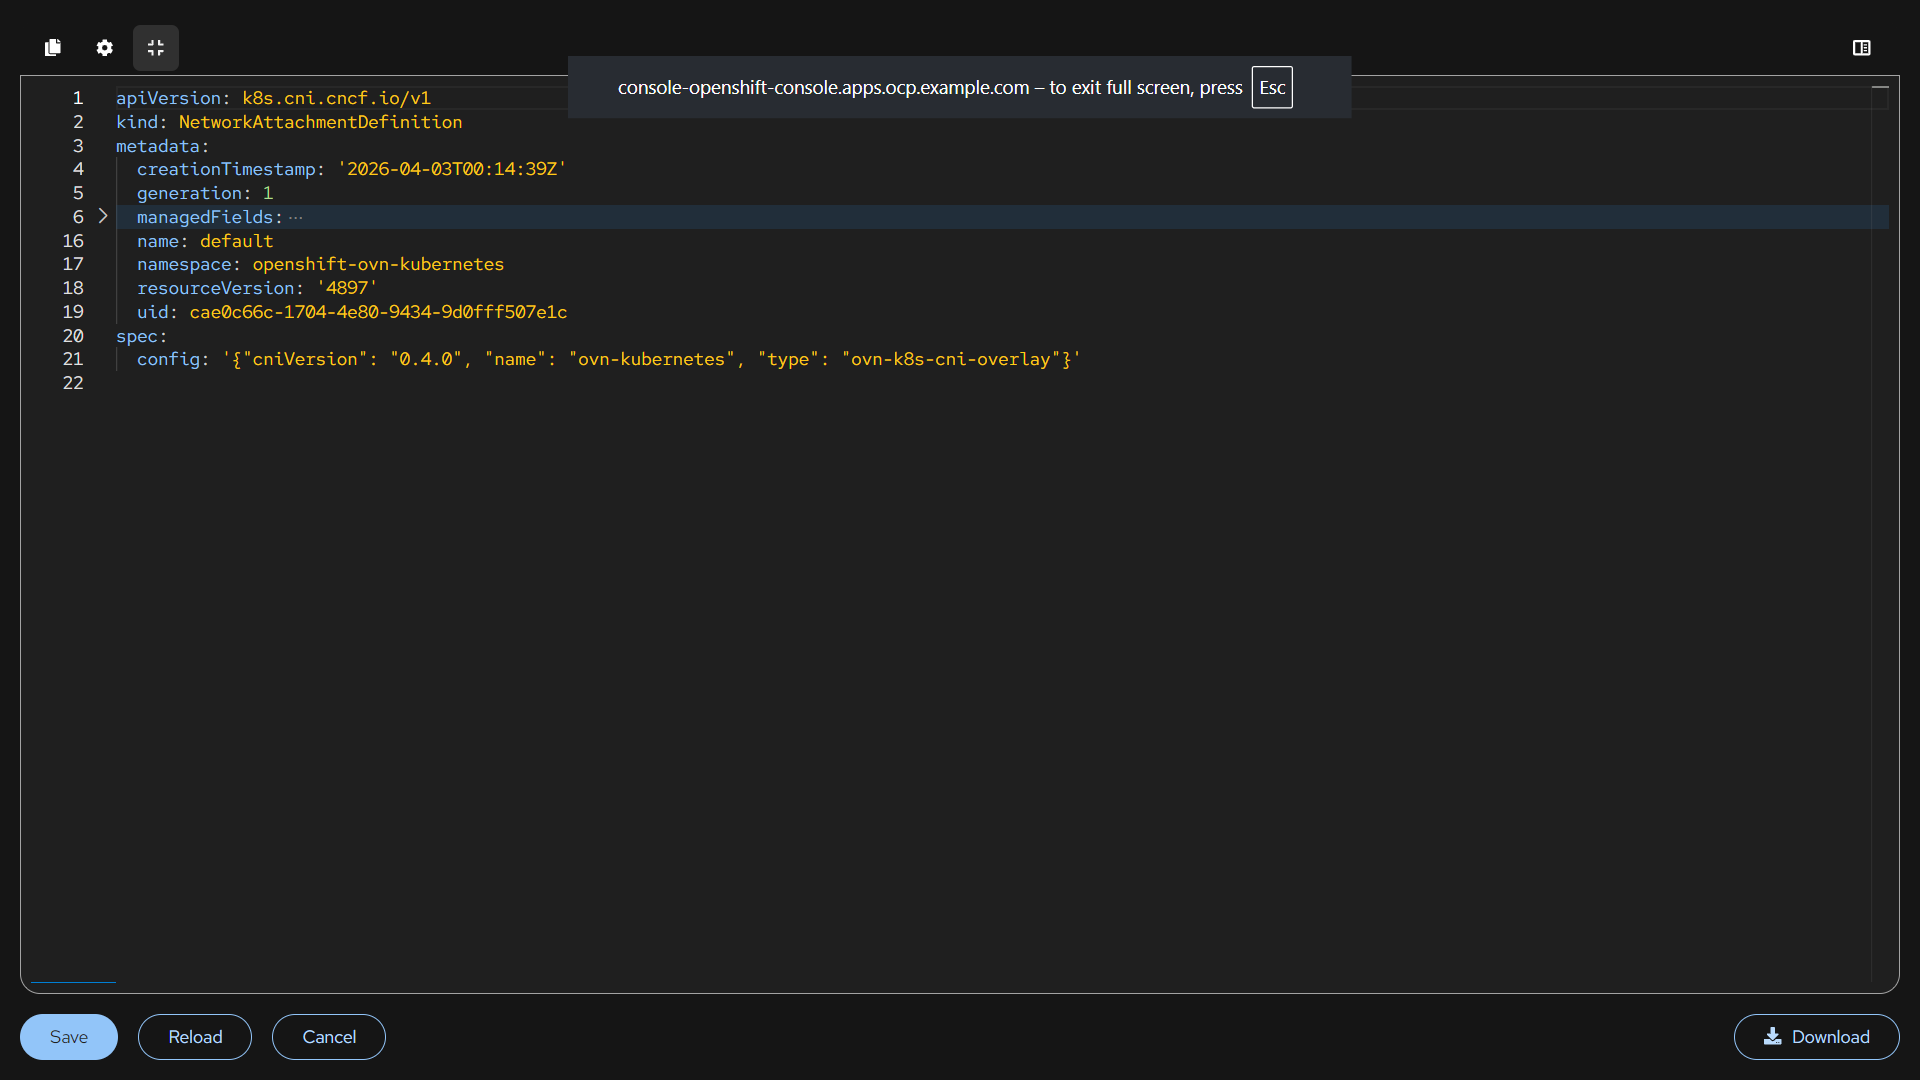
default NAD is for internal pod communication and cluster traffic.
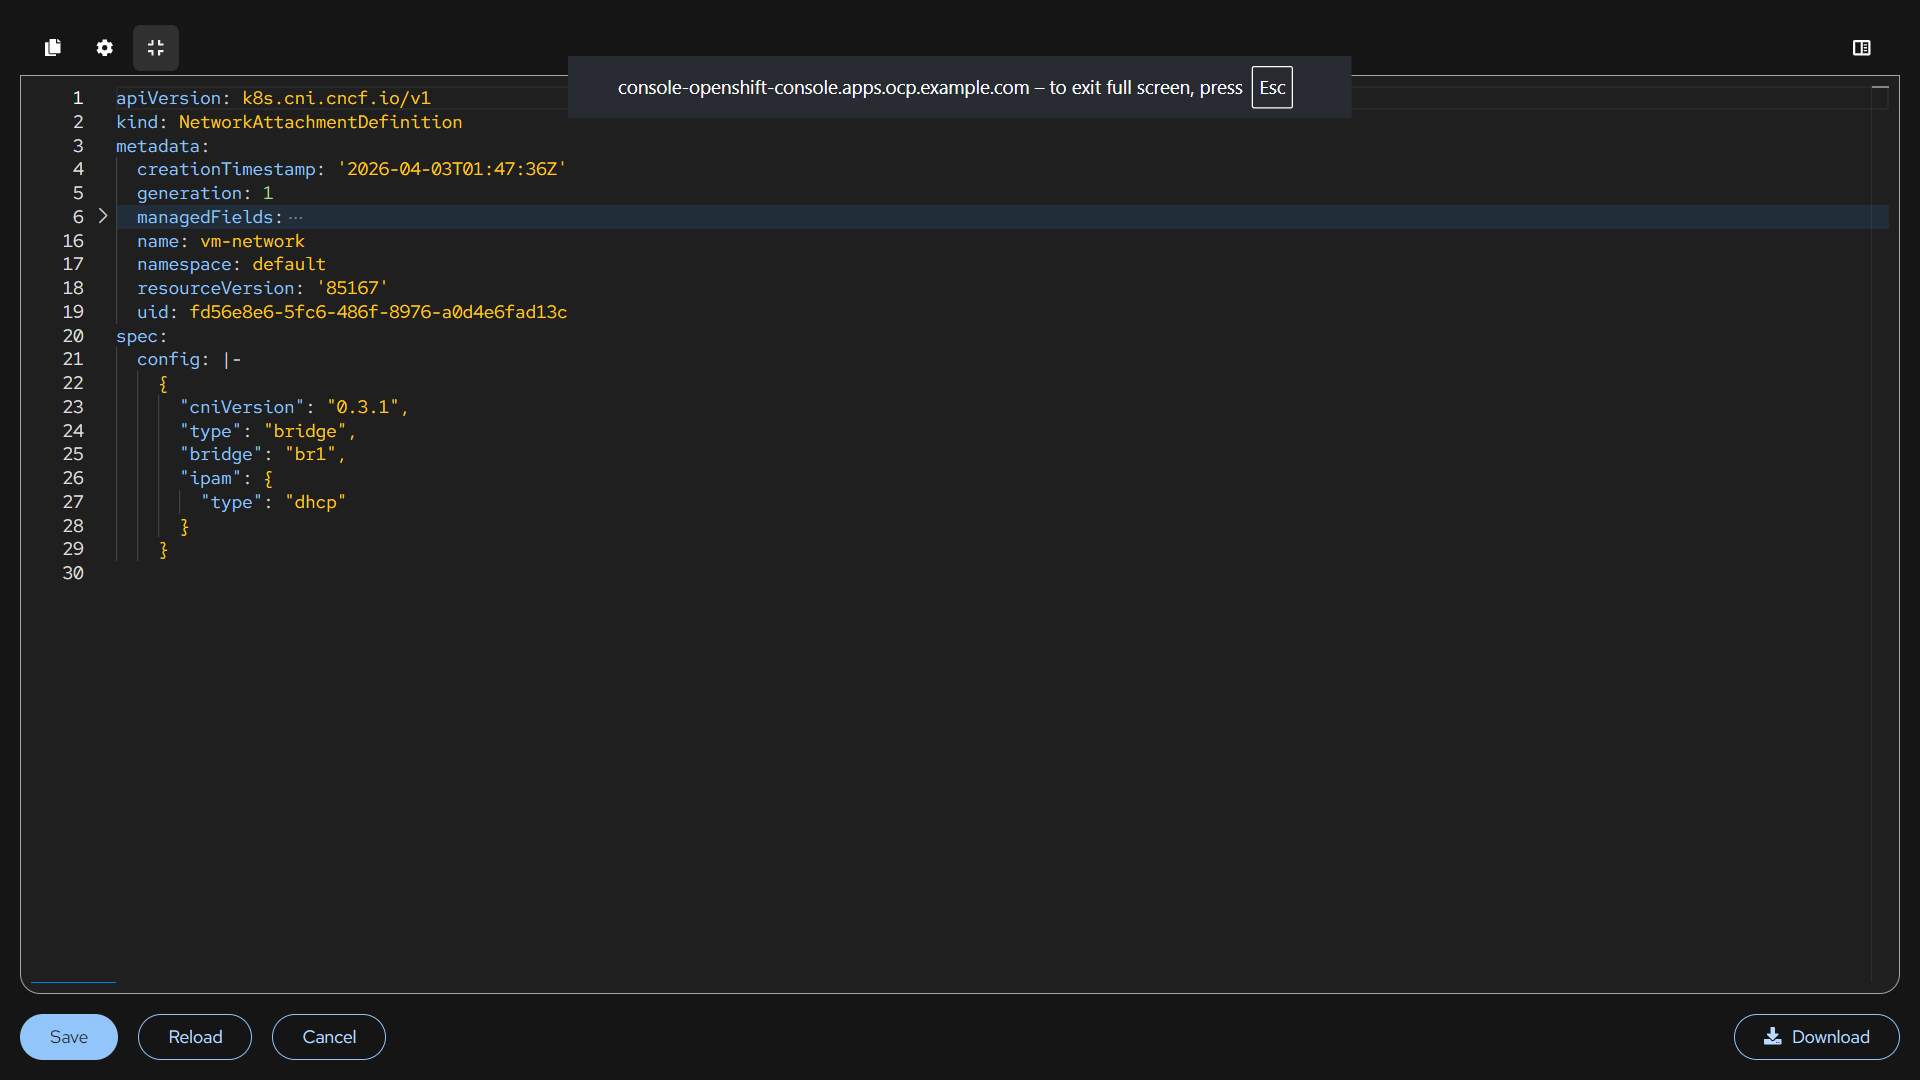
vm-network NAD gets IP from DHCP. It auto-assign the IP to the machine.
vm-network1 NAD uses the ip from the same bridge assigns IP from the custom range. It is an controlled IP allocation.
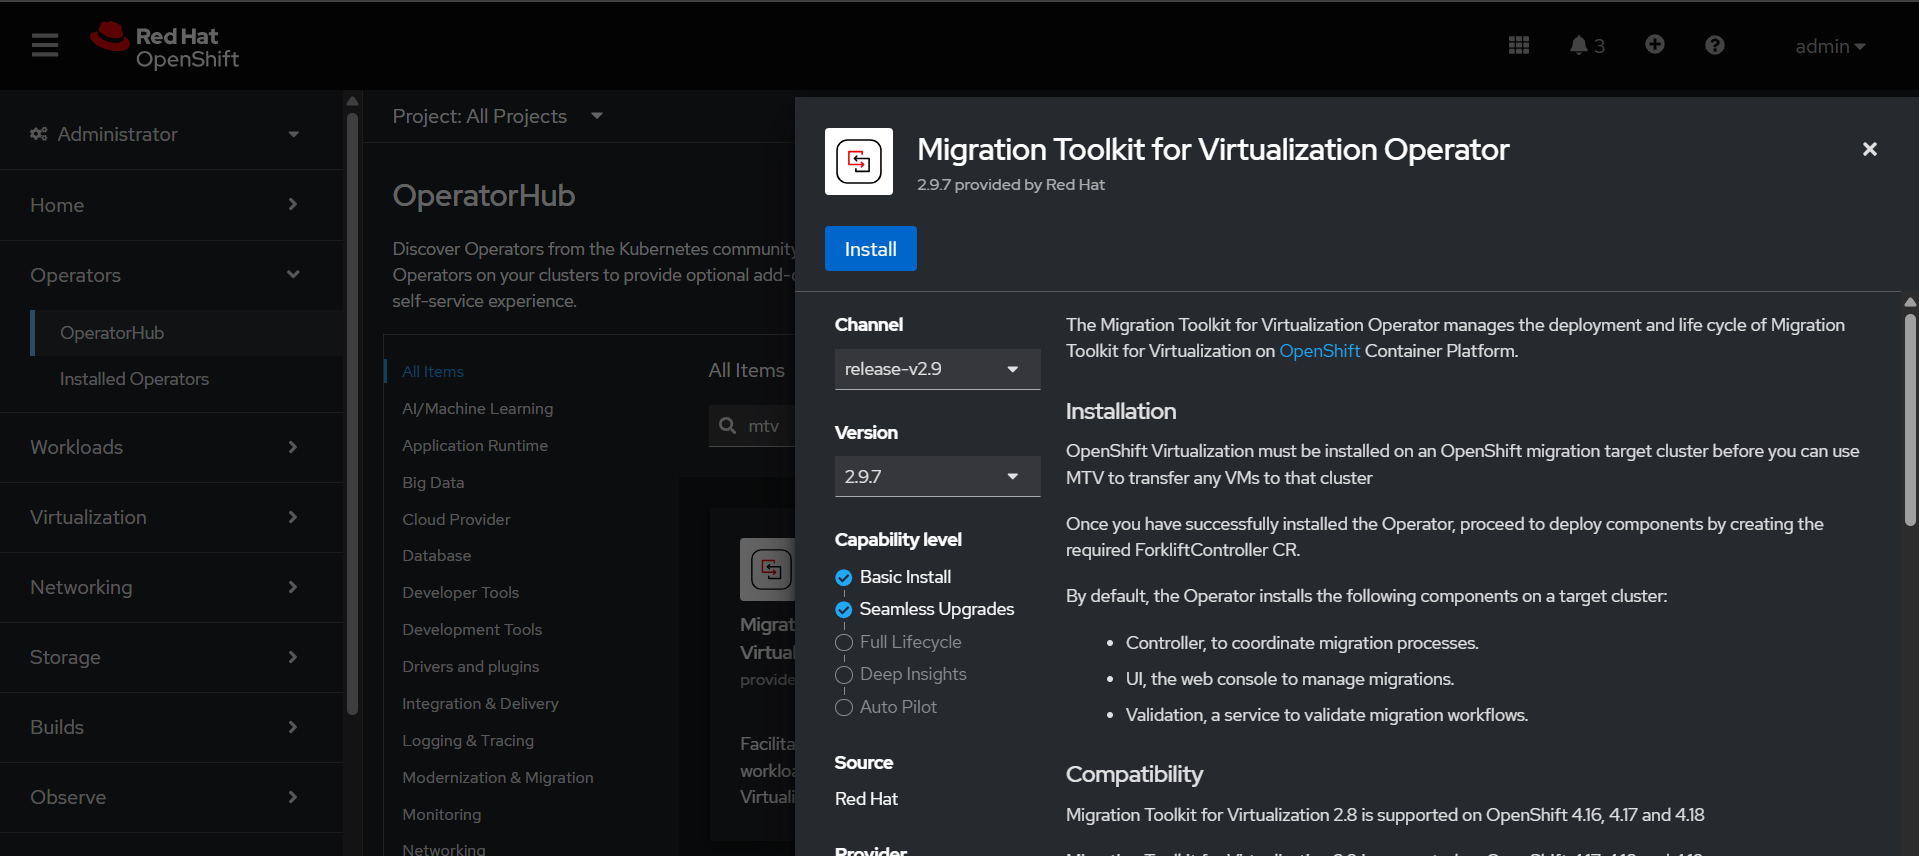
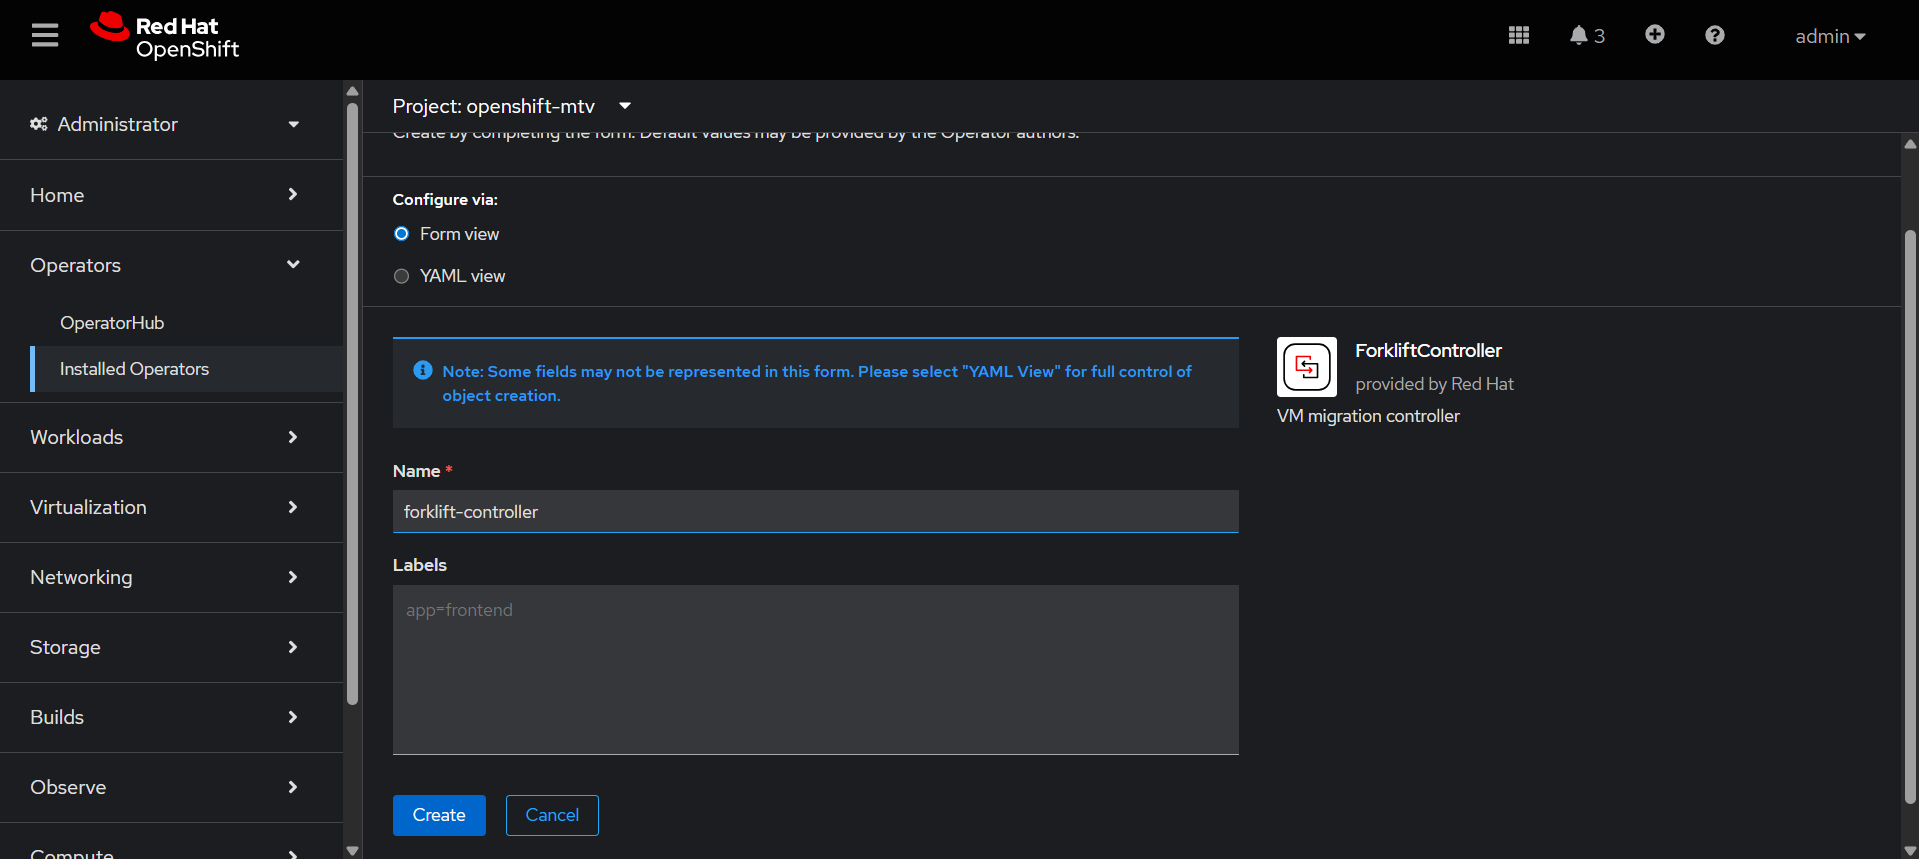
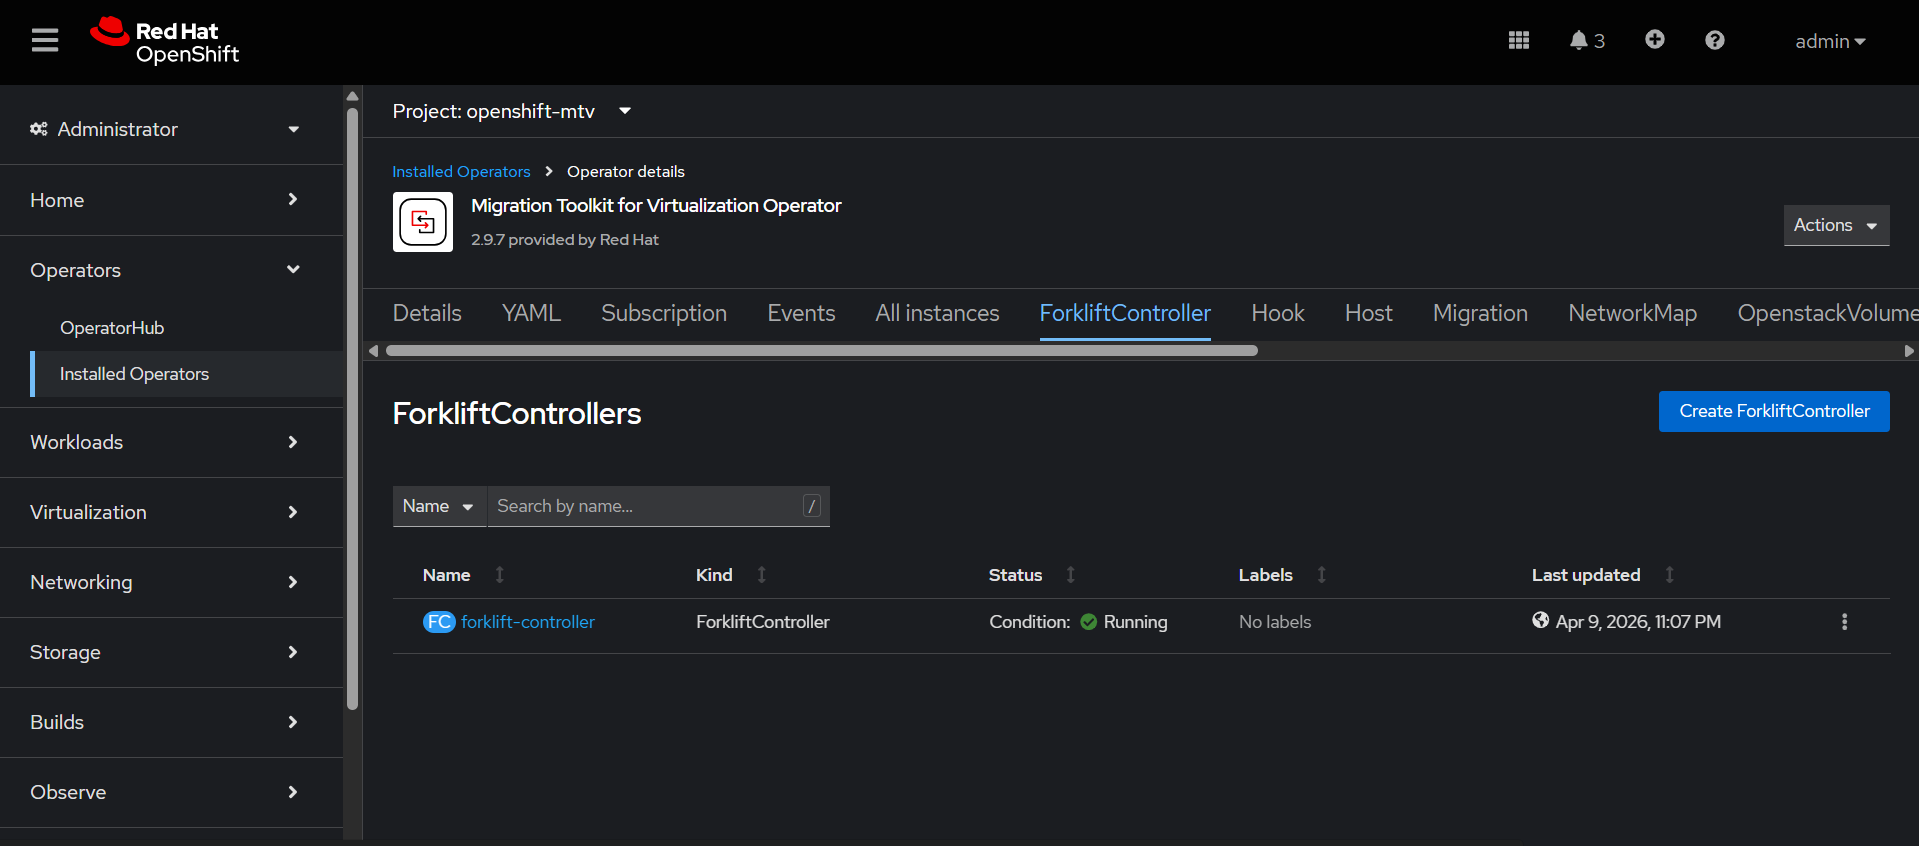
Migration Toolkit for Virtualization Operator Configuration
This operator is used to migrate virtual machines from other platforms into OpenShift Virtualization.
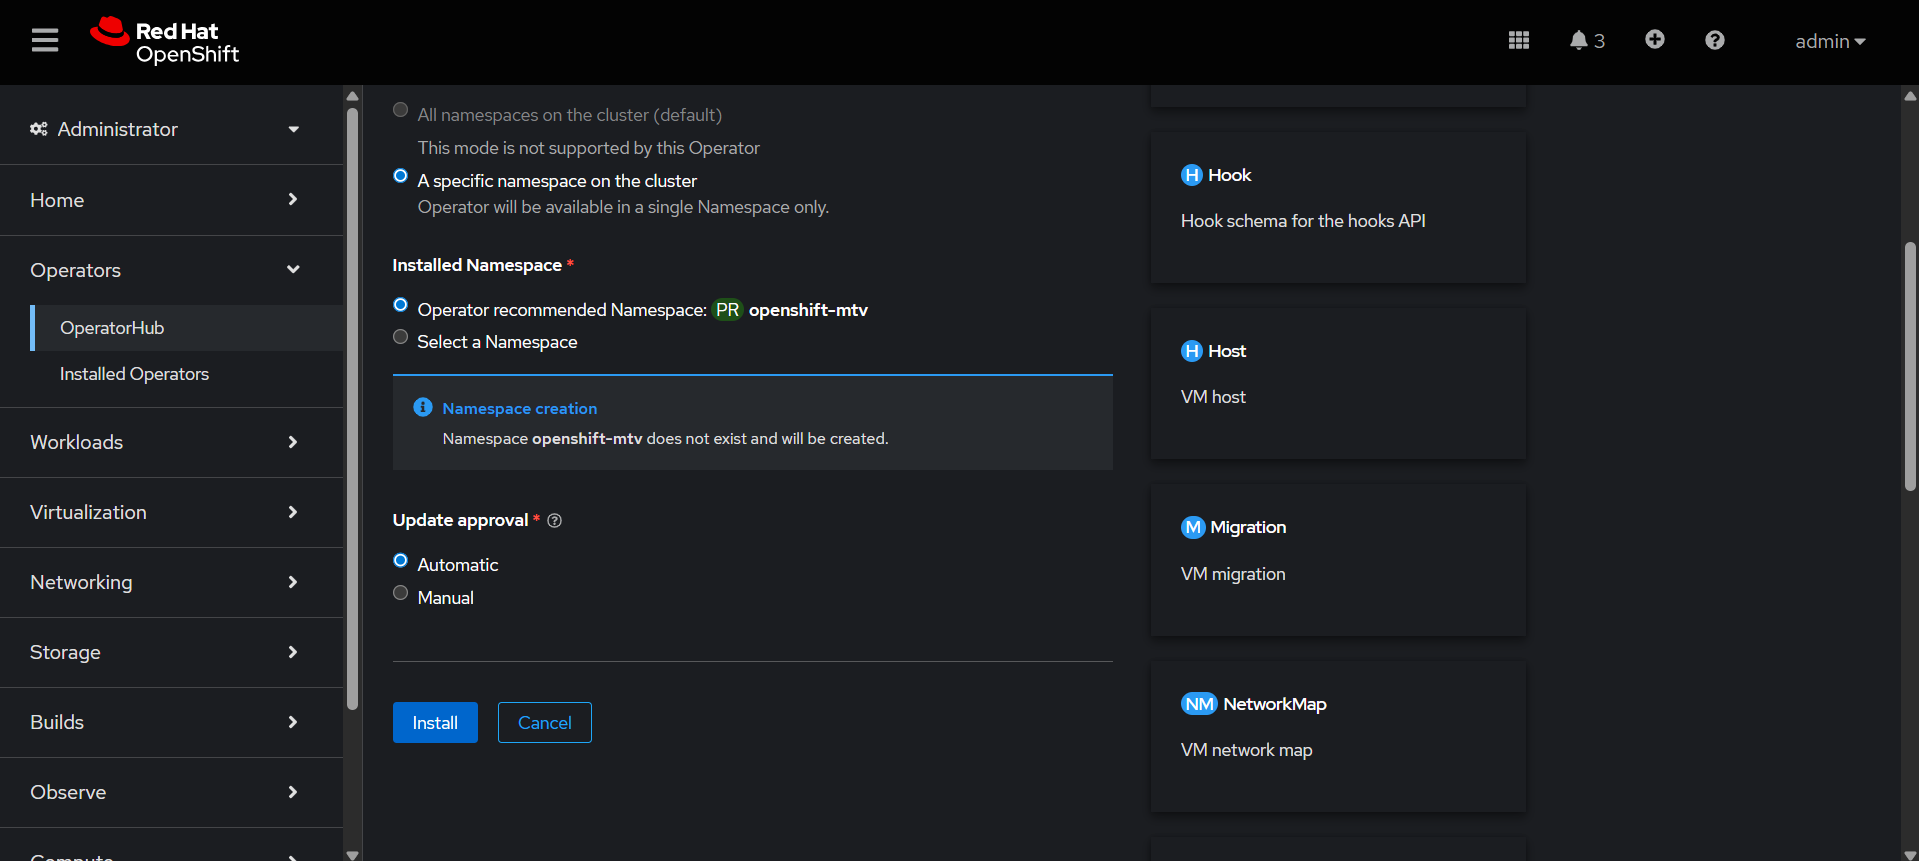
Go to Ecosystem → Software Catalog→ search Migration Toolkit for Virtualization Operator
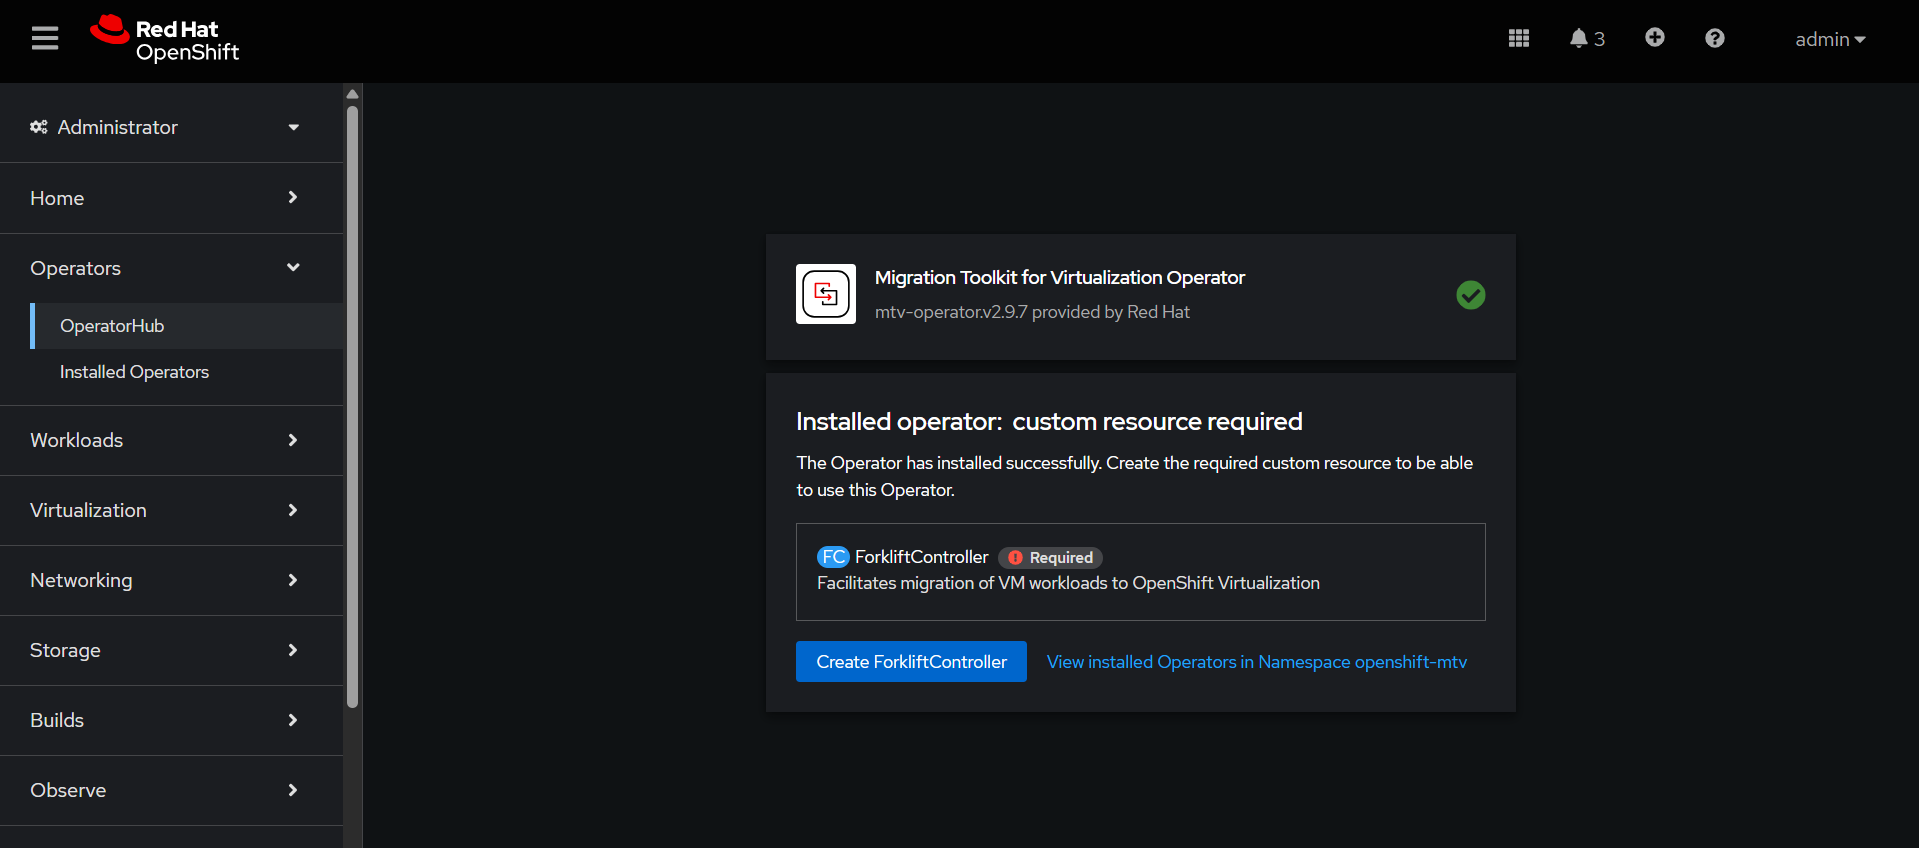
Create forklift-controller, it is the brain of the migration process. It controls, tracks, and manages the entire VM migration workflow.
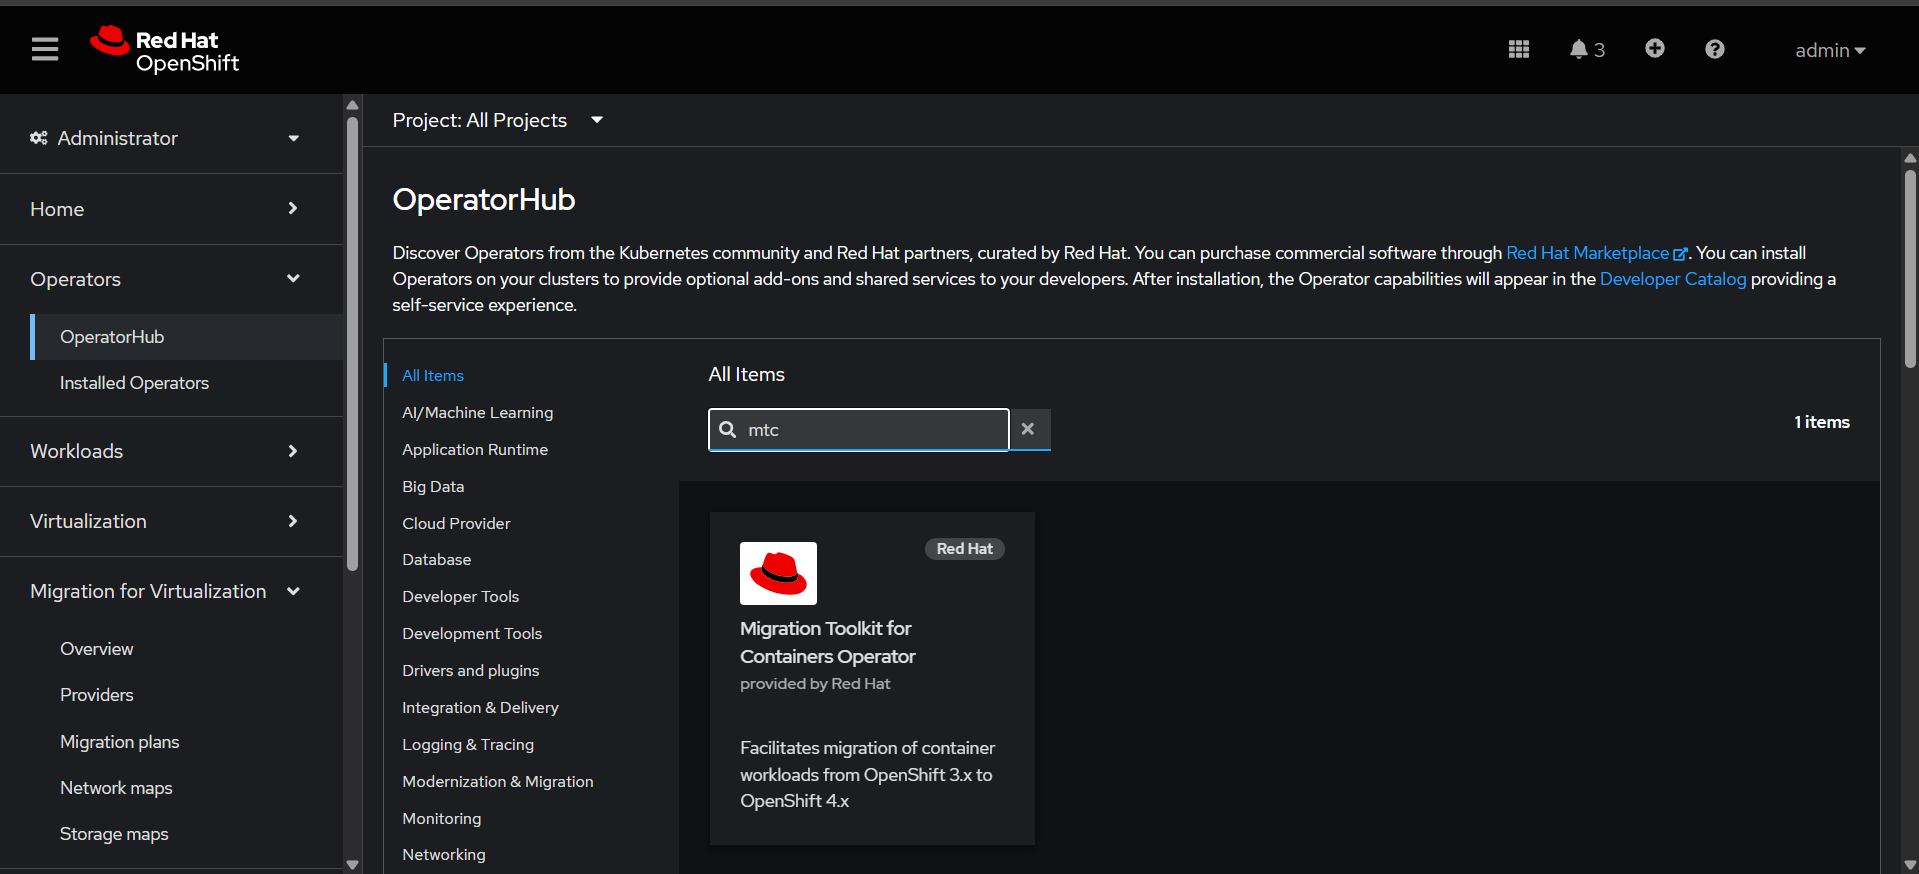
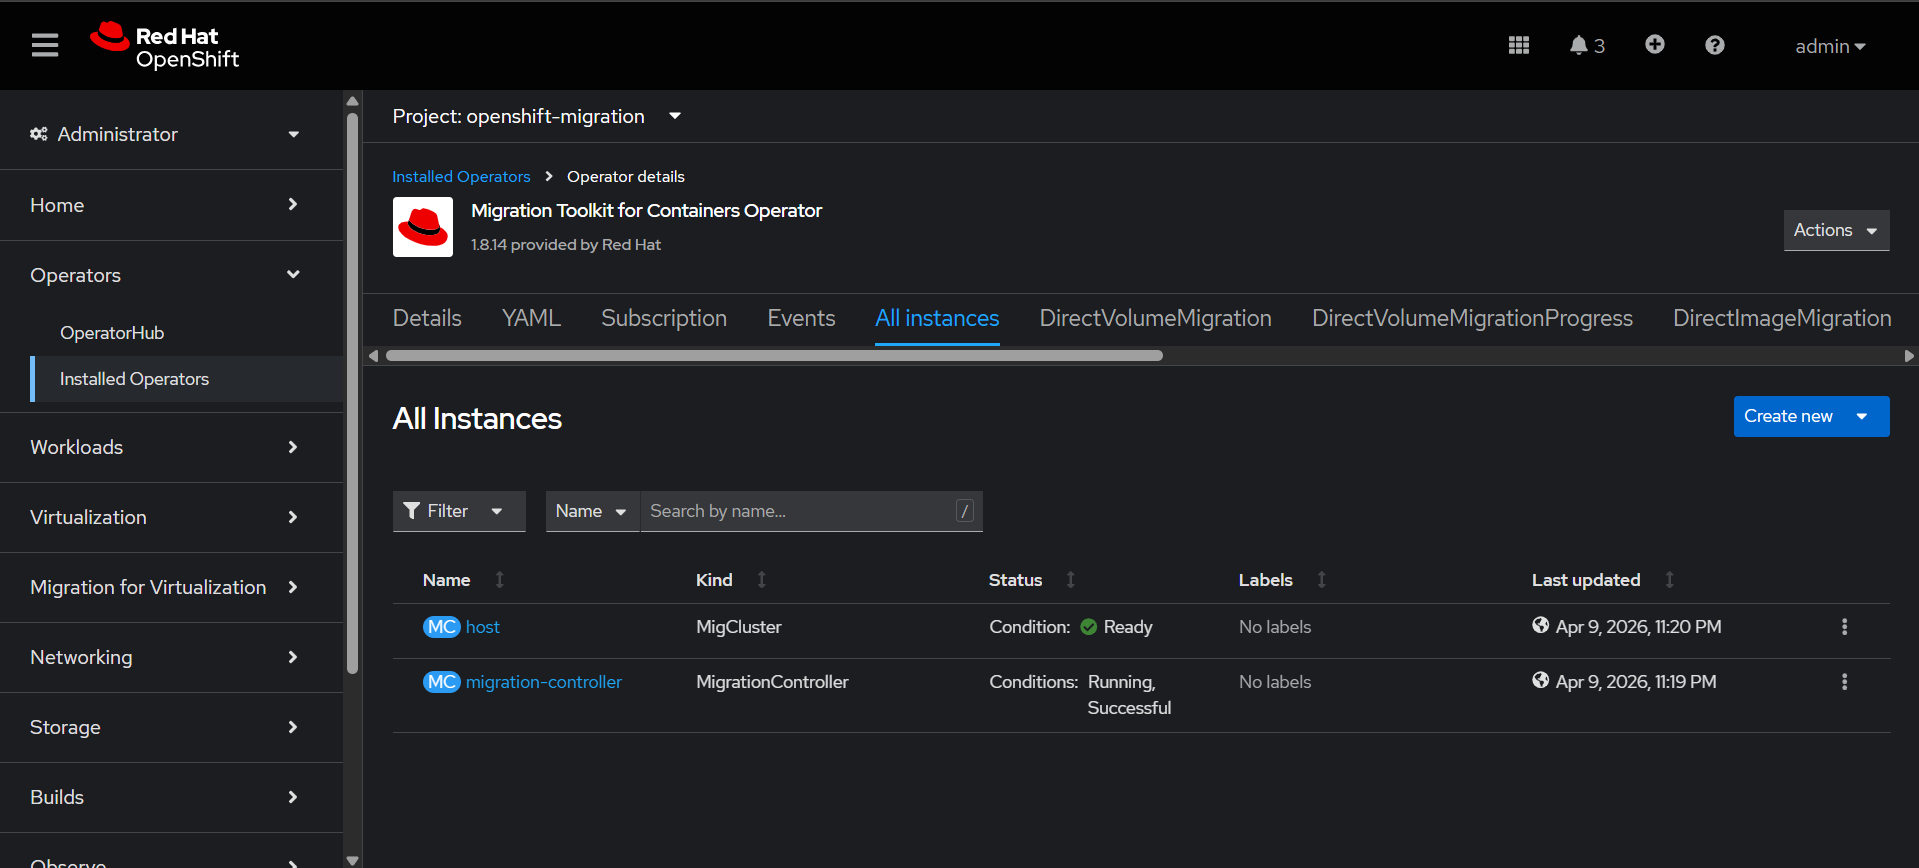
Migration Toolkit for Containers Operator Configuration
This operator is used to migrate containerized applications (Kubernetes/OpenShift workloads) from one cluster to another.
Go to Ecosystem → Software Catalog→ search Migration Toolkit for Containers Operator
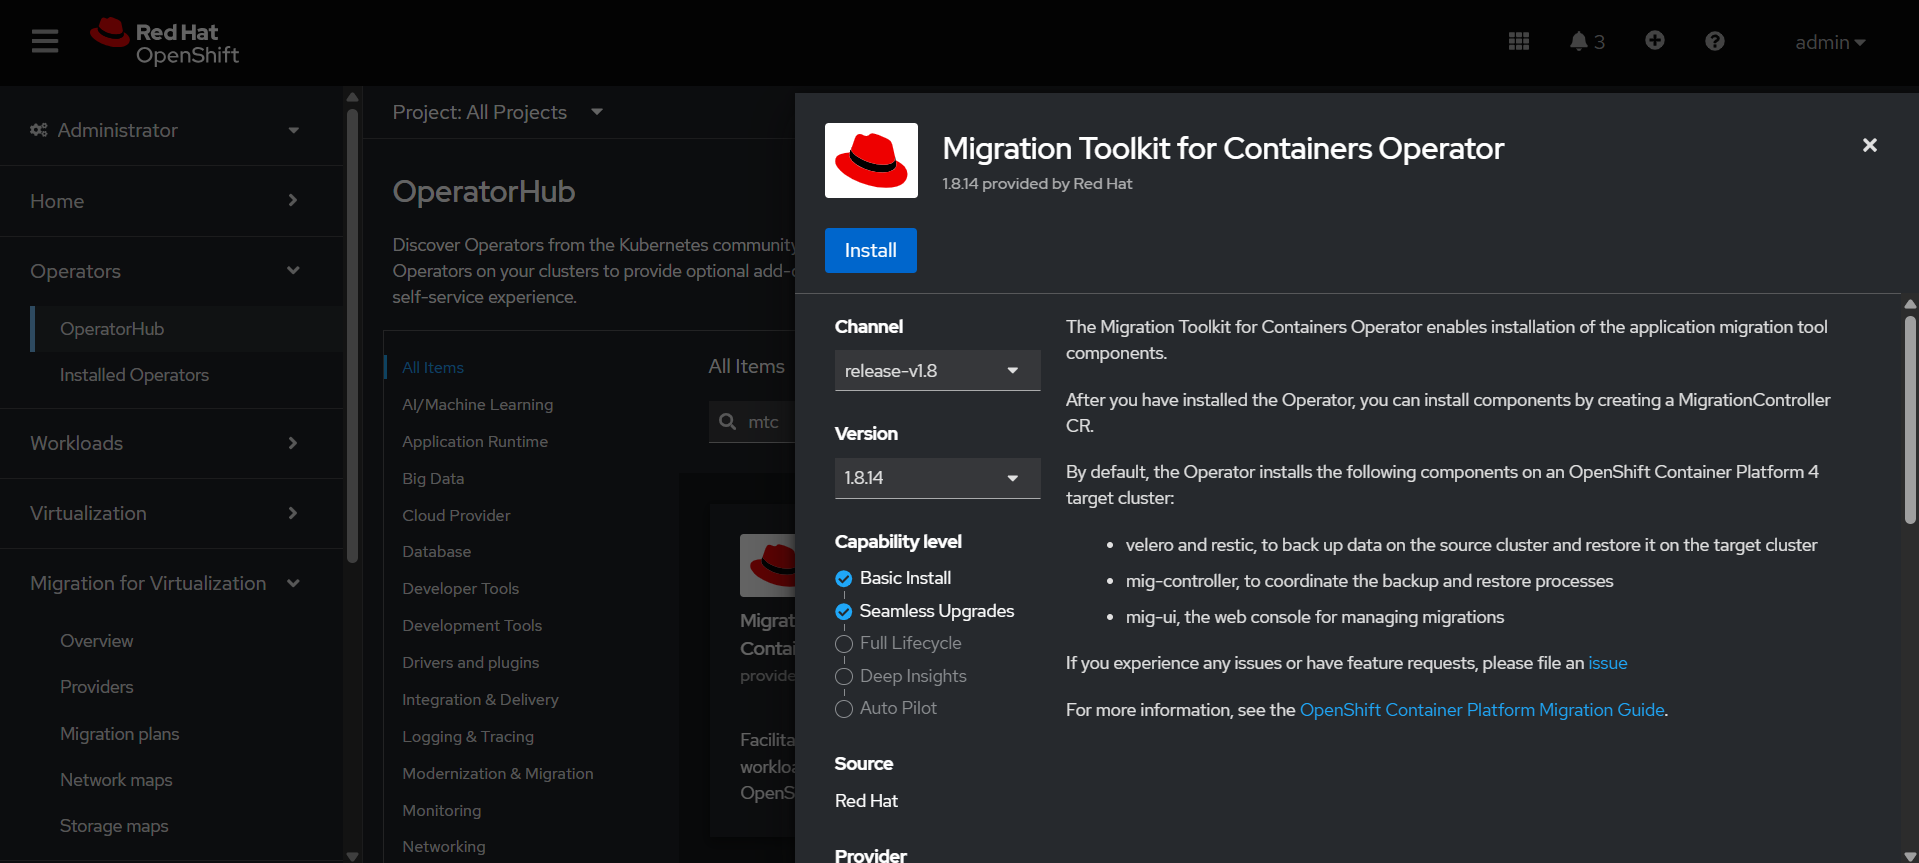
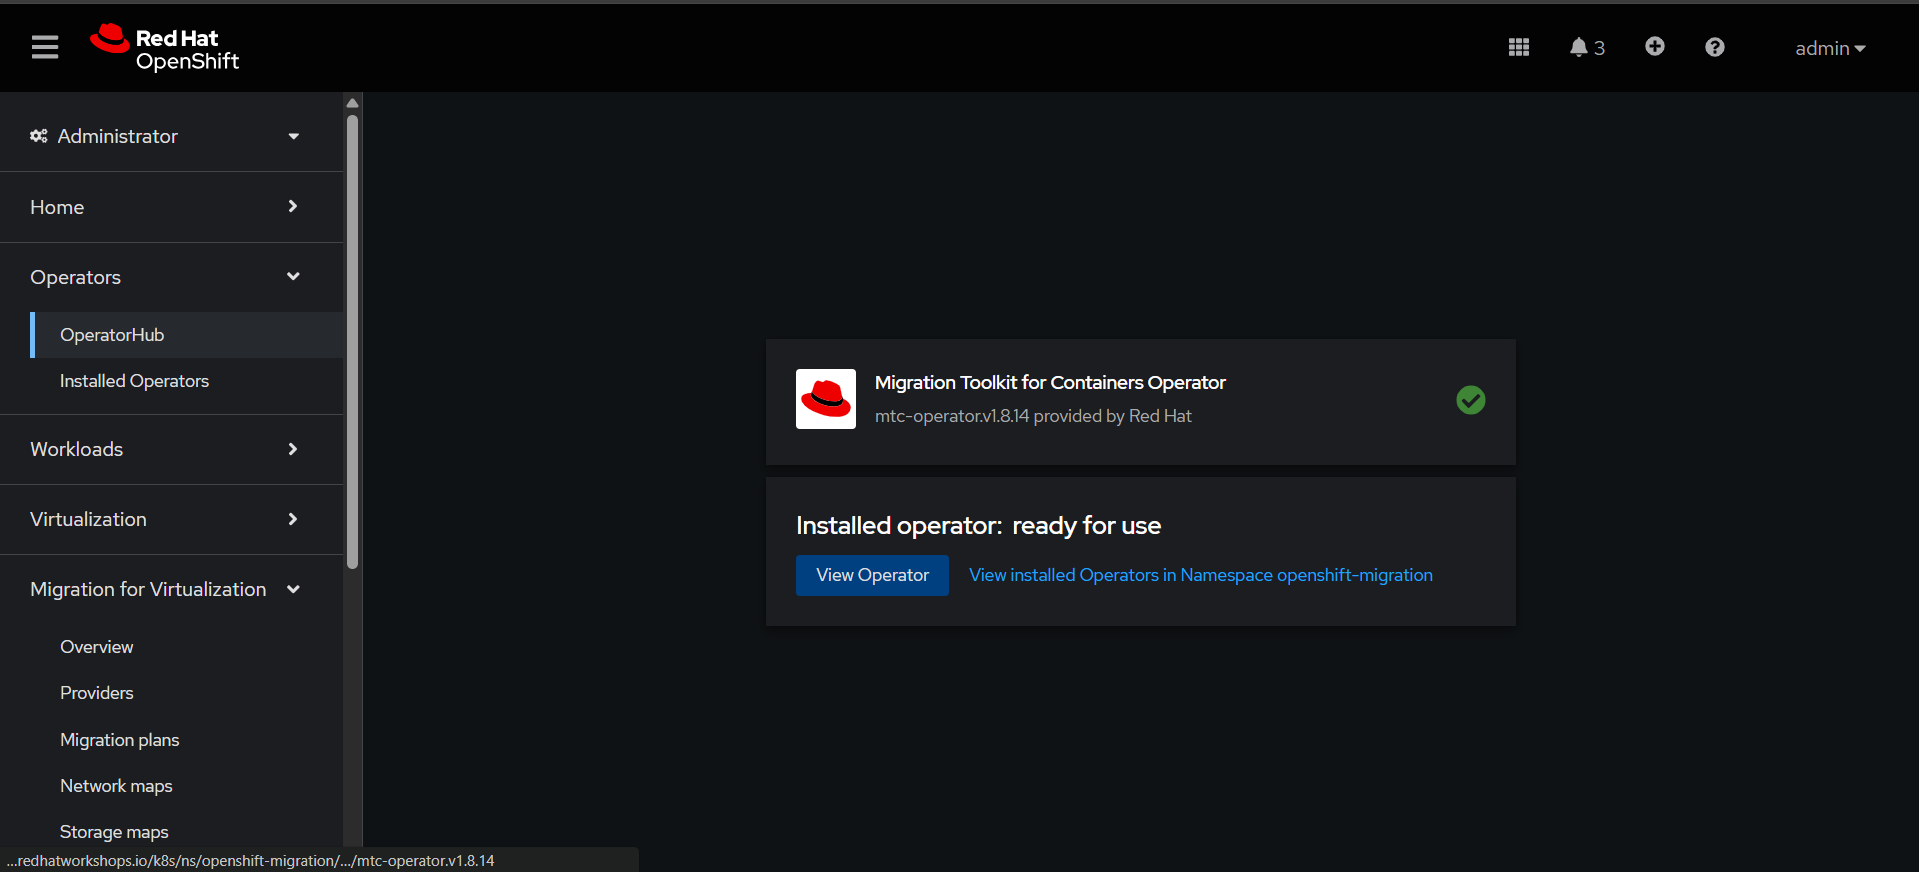
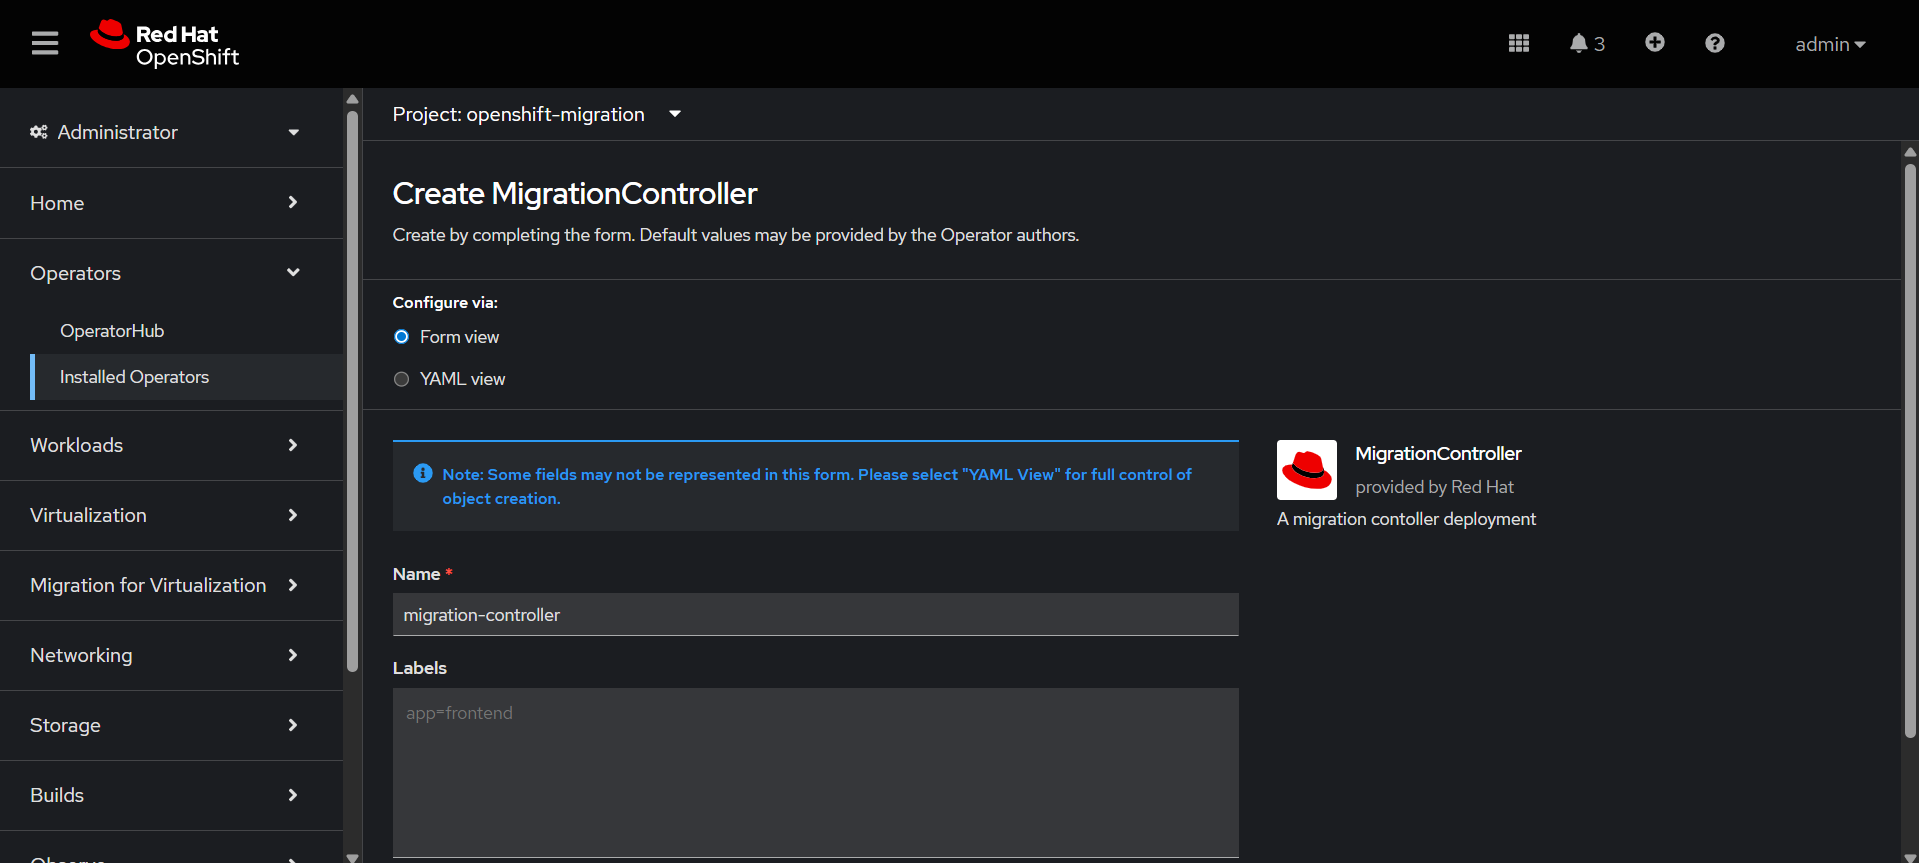
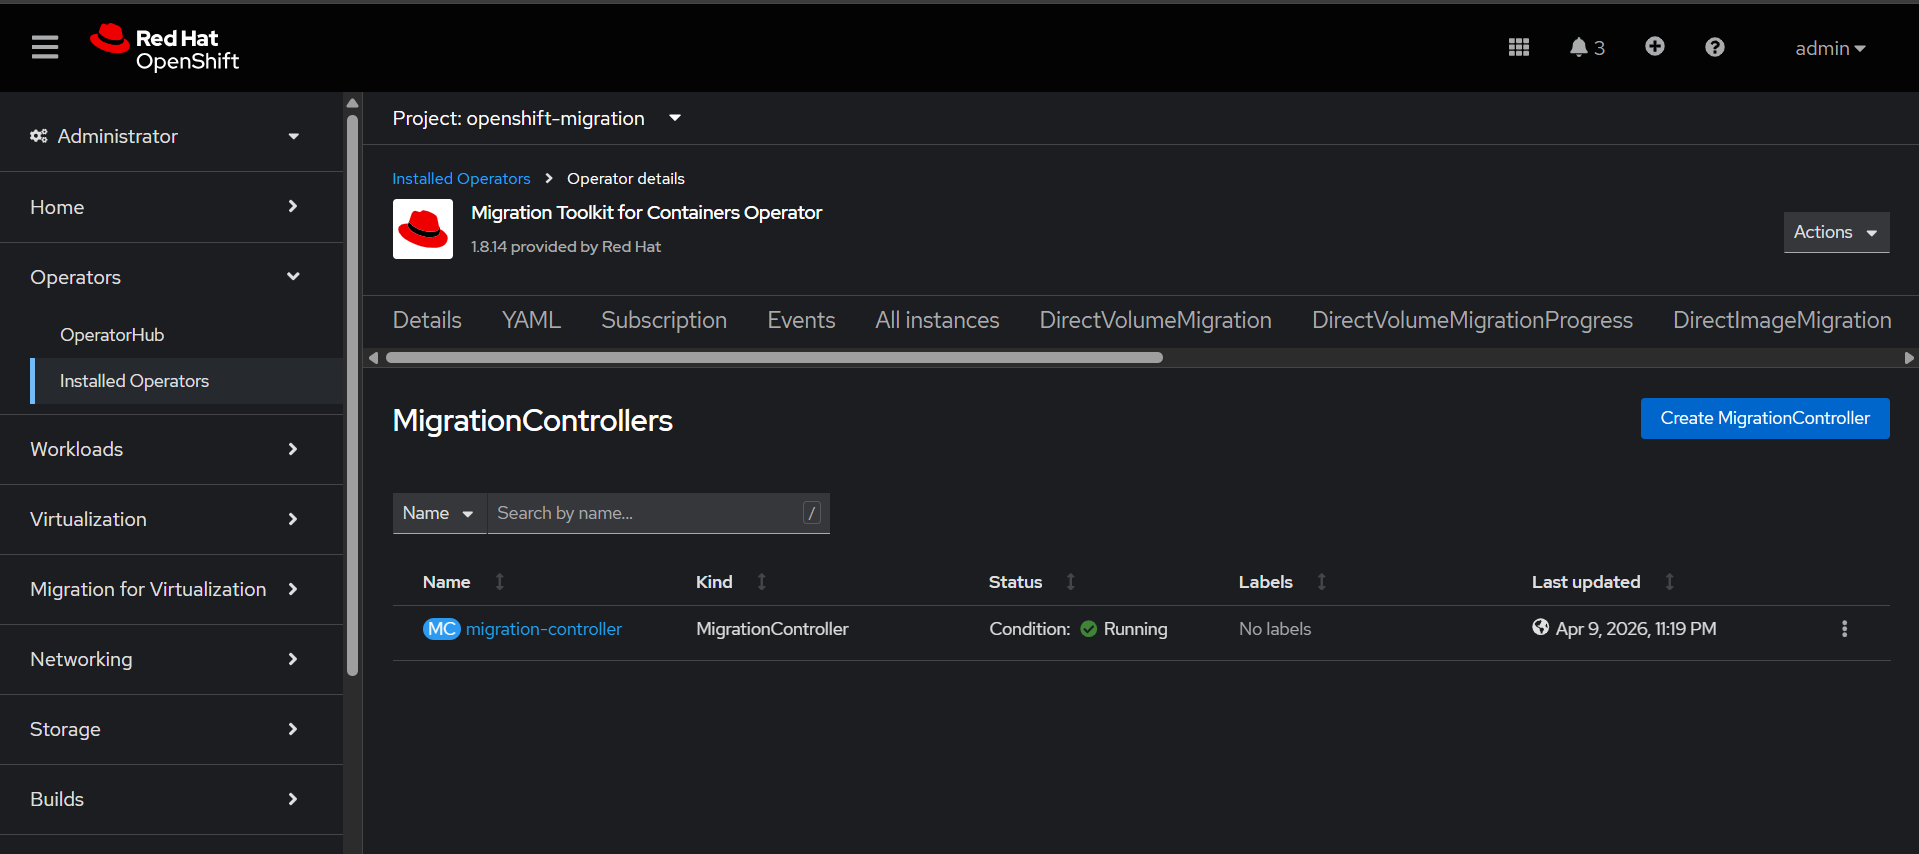
Create Migration Controller which sets up and runs the migration engine inside the cluster.
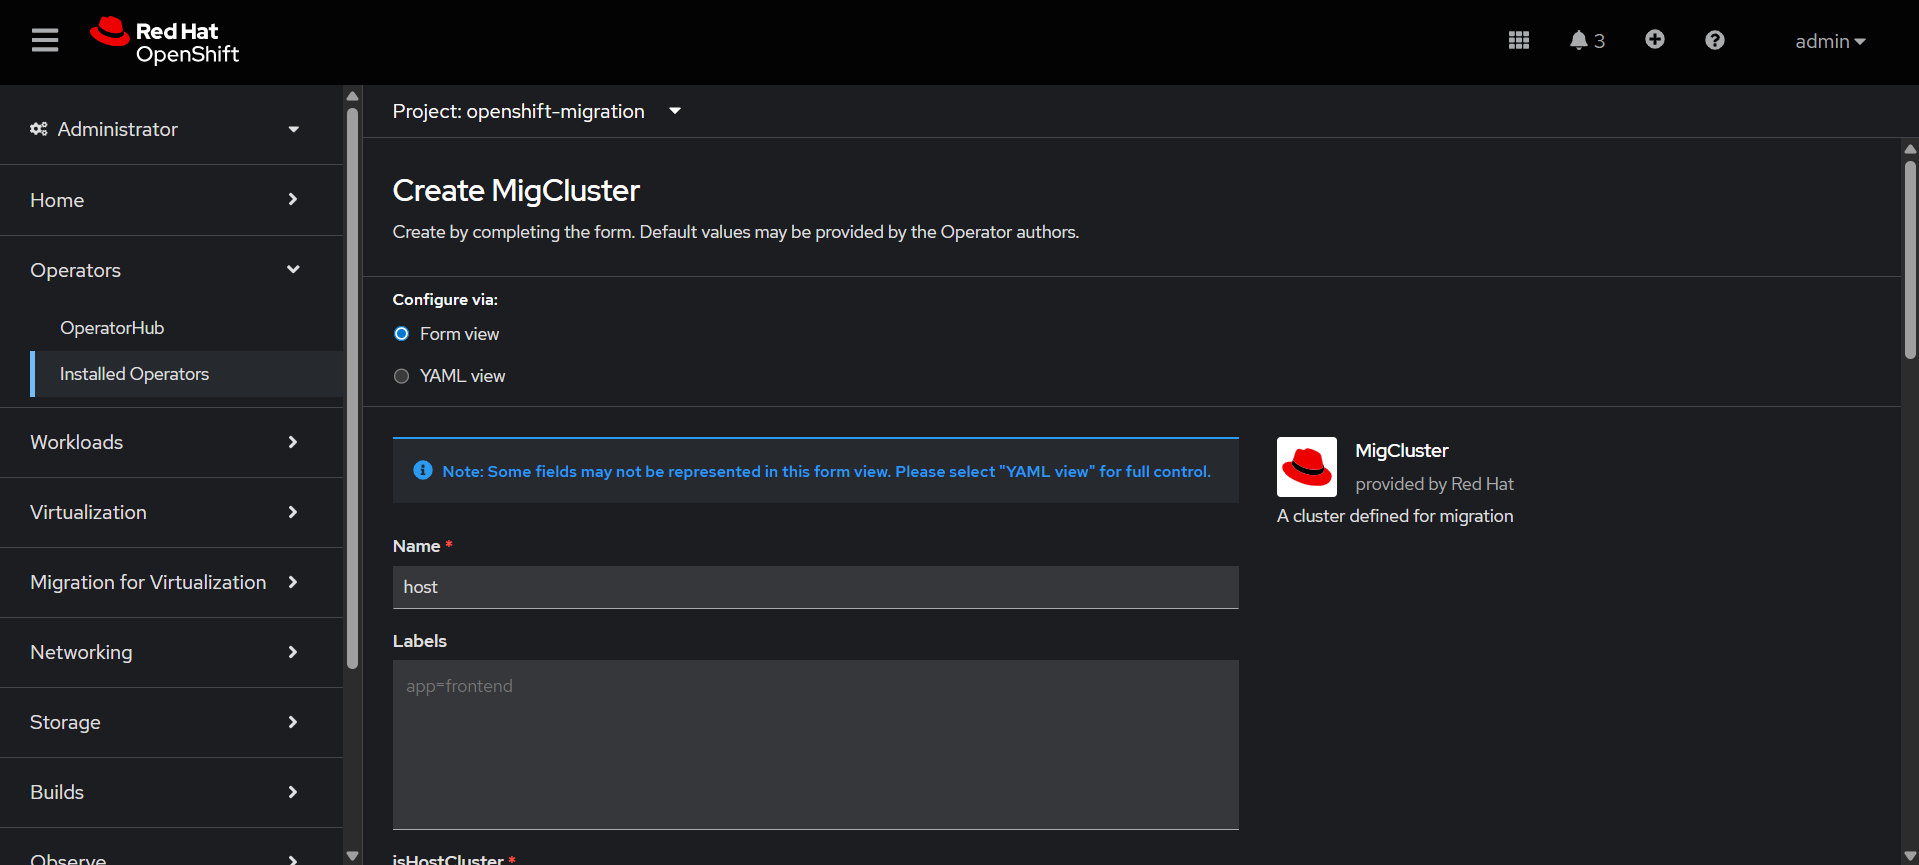
Create the MigCluster
It represents a Kubernetes/OpenShift cluster source or destination that participates in migration
Configuring htpasswd identity provider.
1. Create an HTPasswd file by installing the htpasswd utility by installing the httpd-tools package:
yum install httpd-tools
2. Create or update an users.htpasswd file with a user name and hashed password:
htpasswd -c -B -b </path/to/users.htpasswd> <user_name> <password>
3. Create the HTPasswd Secret with the previously created users.htpasswd file: